How to Decoupage a Sidetable
Today I’m super excited to be participating in a decoupage tour with a bunch of my blogging peeps!
This was my first attempt at furniture decoupage. It was a really fun process and I’m not sure when but I’ll definitely try it again. I can’t wait to show you guys how to decoupage a side table. Come on let’s check it out!
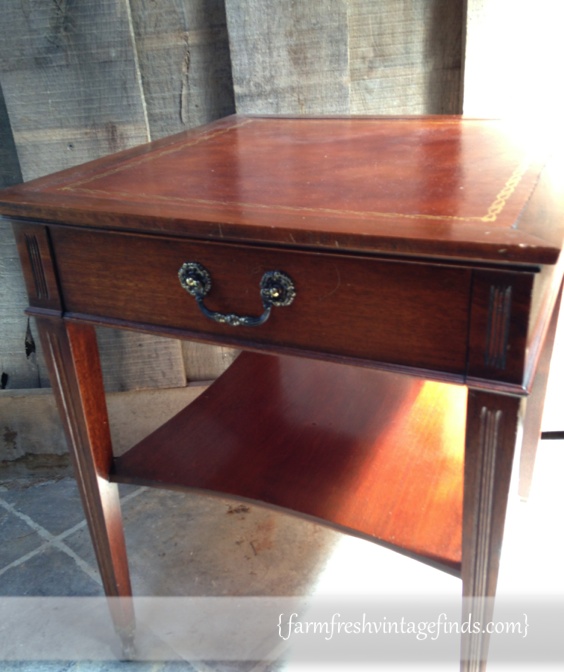
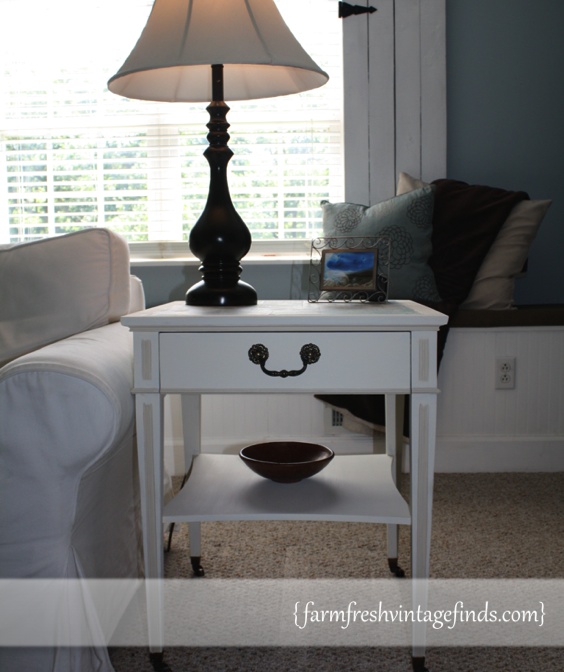
I purchased this little side table from one of my clients this summer. I was in great condition but had this faux leather top with……
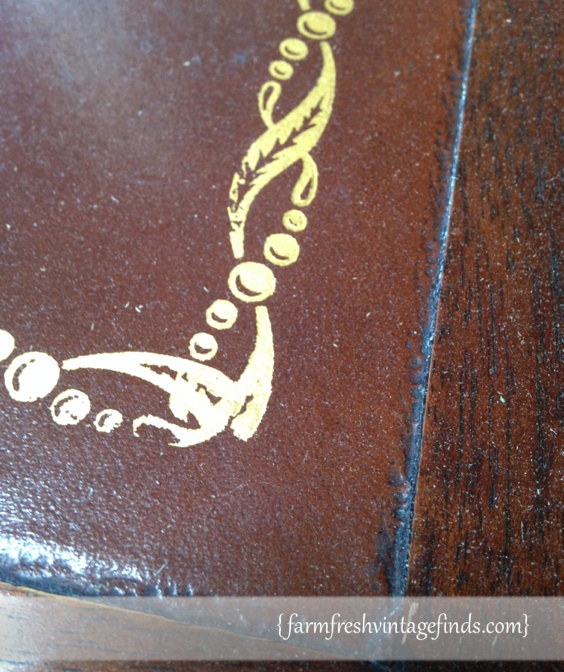
gold detail that just seemed a little dated to me. I decided this would be the perfect piece to try my hand a decoupaging.
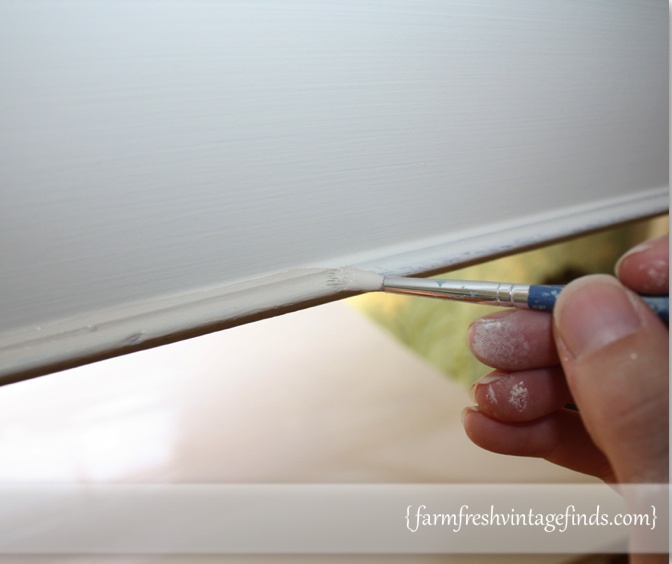
First I painted the whole table with off white and then added some darker off white for a little detail in a few areas.
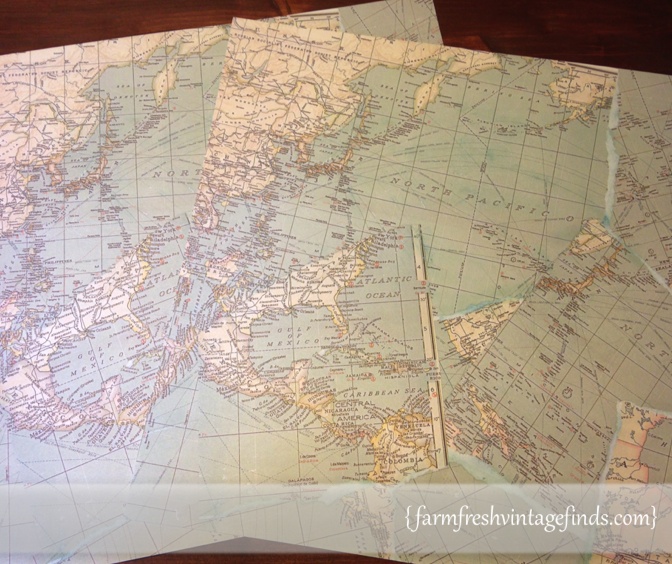
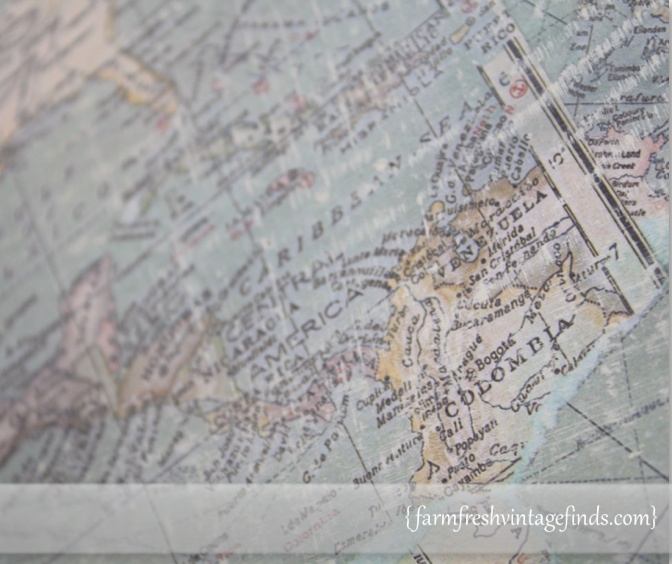
Then I remembered that I had some super fantastic scrapbook paper with maps printed on it. Perfect!
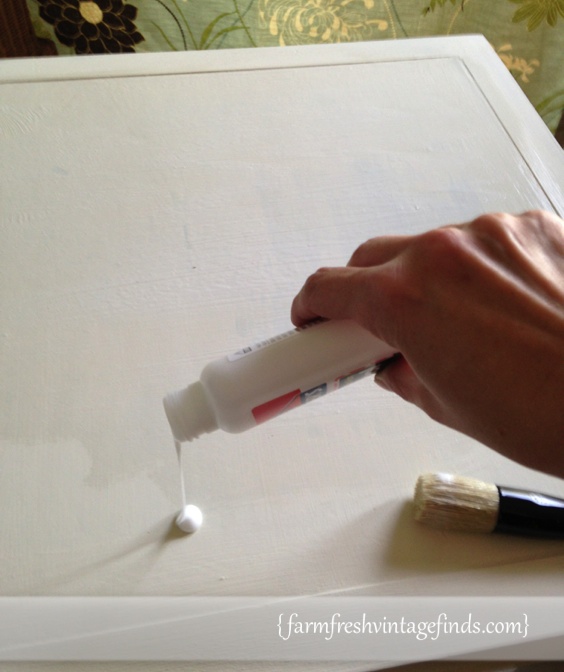
Originally I was going to use Mod Podge but what I had was so old that I couldn’t the lid off. White school glue to the rescue!

After pouring on a generous amount I spread it all over with my Royal Design Stencil brush.
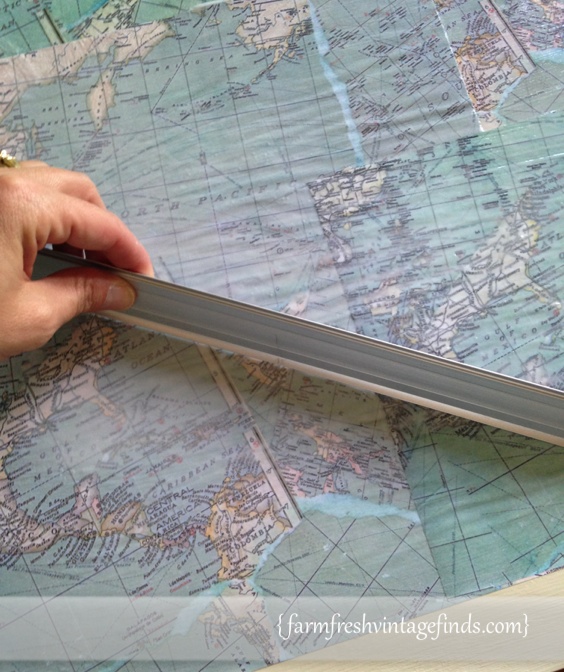
After that I placed the sheets of paper on the top and then used a metal ruler to gently remove the air bubbles.
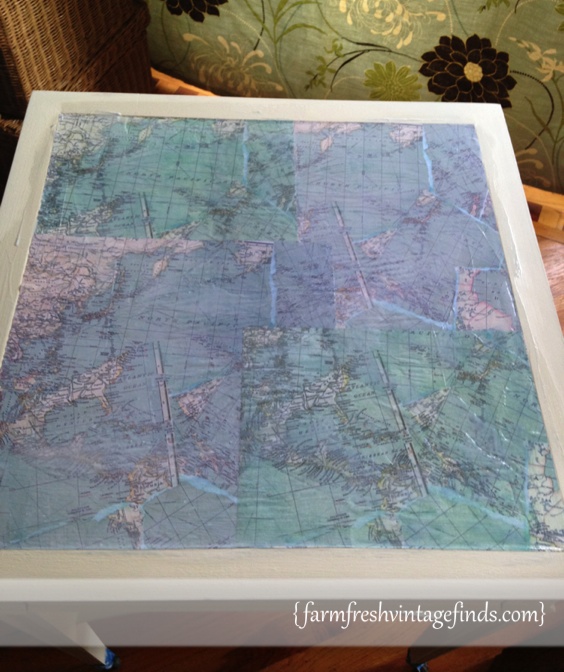
Once I was done with that I put a thin layer of glue on top to seal everything.
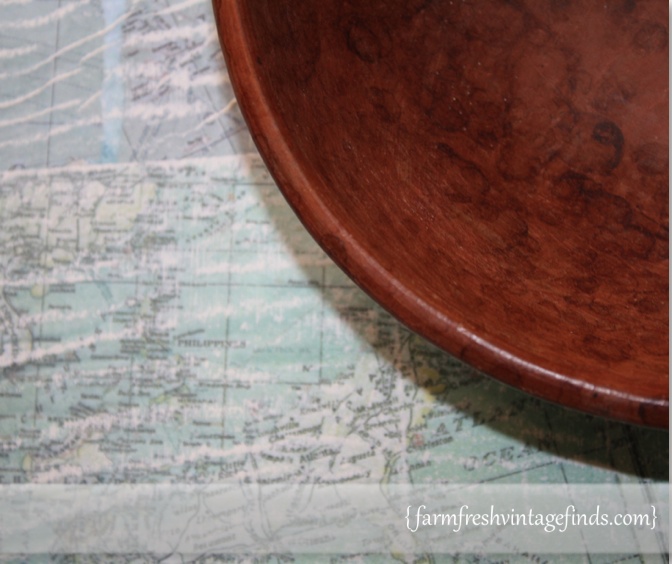
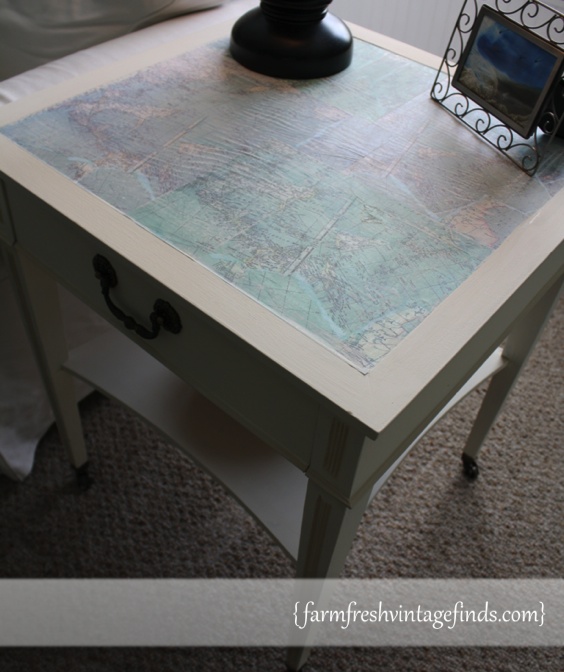
When the glue was dry I decided it looked too new so I created a wash with a little off white and water and lightly painted it over the top.
Here it is! Isn’t it beautiful.
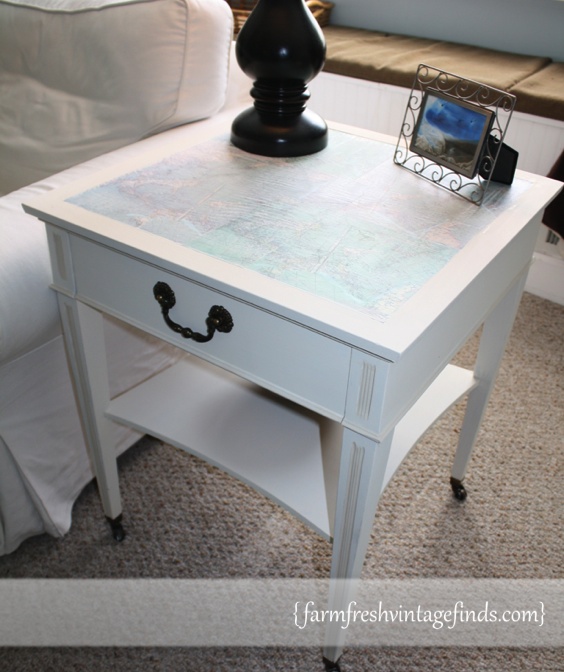
I’m thrilled with how every detail stands out now and how fresh and clean it looks.
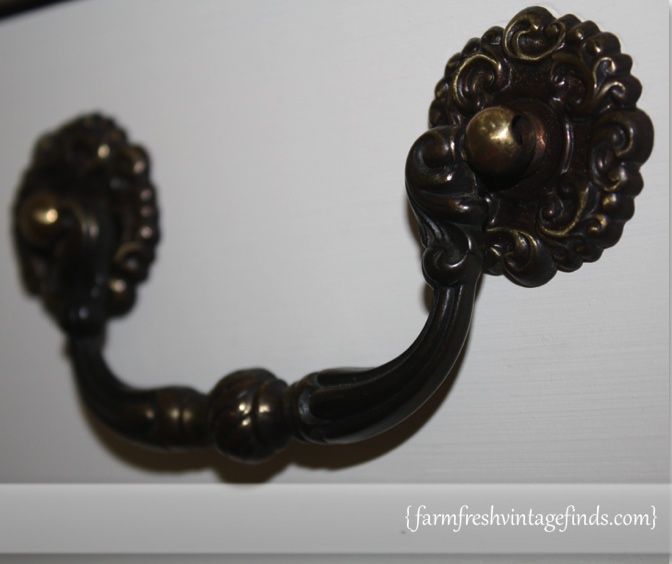
Even the hardware is fabulous.
Leave a comment below and let me know what you think of my first try at decoupage.
Thanks for reading and be sure and check out all the other talented ladies that are part of the tour and let them know I sent ya!

Very Pretty!
Thanks Cindy!
Very pretty, Beth! I love how you accentuated the details of the table with Old Ochre. I wouldn’t have thought to use that color combination. Might have to steal that idea. 🙂 This is a fantastic transformation! XO
Thanks Christy! I lurve these two colors together. I think I’m going to use them on a bed soon. 🙂
It looks so nice and fresh now! I love the maps. They add just the right amount of color. Great job!
Thanks Angie!
Beautiful job Beth. I like the idea of brushing the map to “age it”. It looks fabulous.
Thanks Meegan…it just needed something. Thank goodness it worked out. LOL!
What a great looking table! I LOVE those maps! Life to the full! Melissa
Thanks Melissa! I was so thrilled to find the paper after I realized I gave all the maps I had from homeschooling away! Whew!
It’s so pretty Beth!!! I LOVE maps and am actually doing something similar to the faux leather inserts in my study desk (was going to for this project but I can’t get to it right now!! 😉 )
I LOVE the white brushing over the map…might have to steal that idea for mine too!
Your table is awesome!!!!
Nancy
Thanks Nancy…I can’t wait to see your project!
What a transformation! I love the pretty colors in the maps and that you used the wash to age them. Super cute table!
Love that table now, I have one quite similar I’ll be doing something like this on. I want to get little casters for legs also. I have table next to couch but it’s too high so want to use one like yours. Think I’ll make some chalk paint to finish it with and decoupage also. Have some map papers myself to use. Or I’ll copy map out of hubs old trucker atlas. You did such a great job, that table looks altogether different and so much better. Glad you shared this project as you inspired a few of us. Happy days
Thanks JaneEllen. I had to make some copies of my scrapbook paper so I’d have enough. I hope you’ll try it!
Super Cute Beth! I just used Old Ochre for the first time this week and loved it. I’m also digging the map paper. ~Sonya
Thanks Sonya-I’m definitely going to add small maps to my treasure hunting.
I love your decoupage table Beth! The white-wash makes it perfect!
Thanks Kathy! I’m glad it turned out as well as it did….I was nervous about this one!
Love this table!!! Maps are my favorite 🙂
Debbie
Thanks Debbie! They’re becoming my favorite too. 🙂
It’s absolutely perfect! I love your paint color choice and as a map lover, this project is right up my alley!
Just love your side table! I’m a pushover for anything with a map 🙂
Beth,
It sure is a beauty! I just love maps on furniture. So need to look for scrapbook paper like that! Love!!! ~Christy
This turned out great! I love the paper you chose. Awesome makeover! And I love your use of the word “sloaned” haha 🙂
This little table turned out wonderful! I love maps. The map look great with the crisp white. Fun tour! ~Jeanette
This is such a pretty table, Beth! I love what you did with it. It’s classy with character and has a beautiful soft look. 😉
Thanks Jen!
Love! Beautiful job! I’ve not tried this yet but your post gave me courage to try very soon!
Your table turned out so great! The paint combo and white wash finish really make the map soft and old world looking in a crisp, new way!
This would be perfect for one of my end tables! It has a HUGE water/heat spot that I have never been able to get out, so I should do something like this on the top to “fix” it!