How to Strip and Refinish Furniture Part 1
I paint wood. I paint A LOT of wood. In fact I just shared a post the other day with just a few examples of wooden furniture pieces that I’ve painted (among all the others that I’ve blogged about.) So this may come as a shock to all of you but……..I love stained wood too!!!! I love to strip and refinish furniture because every once in a while you come across a gem with wood that just sparkles!!! So I thought I would do a series and show you how to strip and refinish furniture.

Could you use a step-by-step guide to lovin’ on some wood? They’re lots of opinions on the best ways to do this so I’m going to share how I do it and hopefully help someone in the process. I’m not sure how many post will be in the series (a lot of that will depend on you and your feedback/questions). But I am sure that after we’re done you’ll have lots of answers to your questions about stripping, sanding and staining wood. Are you ready? Let’s get started.
The first and arguably most important step in refinishing (or painting for that matter) furniture is prepping your piece. I’m going to assume that you have a piece of furniture that is in rough shape and needs to be stipped and sanded before you start staining it. If you are lucky enough to have a piece of raw wood or don’t need help with stripping and sanding then you can skip these steps. I wrote about some of my favorite stripping techniques here but I’m going to take a minute to talk about them in more detail in this post.
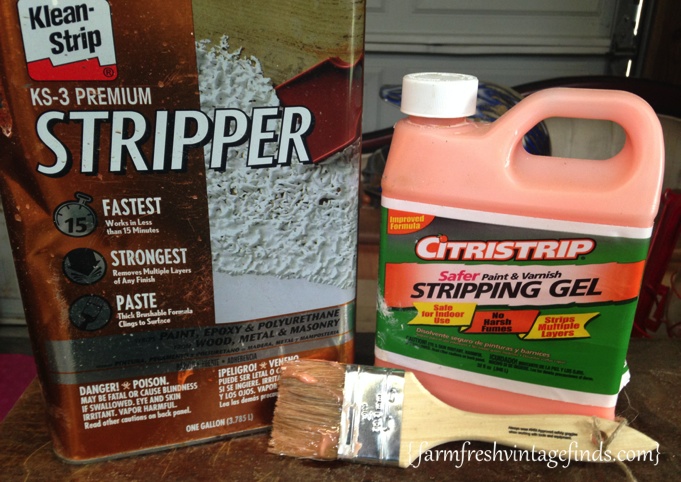
I have used several different kinds of strippers. The ones in the photo above and Kutzit for Antiques and Fine Furniture are my favorites. Stipping is a messy job. You are using chemicals and that needs to be taken SERIOUSLY and done in a WELL VENTILATED AREA. You will need to wear protective eye wear, gloves and a mask. Do not get stripper on your skin, it burns…trust me. Follow the directions on the individual container for timing and even when the paint or stain you are stripping starts to bubble FOLLOW THE AMOUNT OF TIME ON THE CONTAINER. Removing the stripper too soon just creates more work for you. Let the stripper do its job.
OK here are two examples of a surface that needs to be stripped. One is a door with layers of paint on it and the next is a chest that had a coat of stain and a couple layers of poly on it. I’m showing you this because I want you to know that the process I use is the same. Whether I am stripping paint or poly and stain. (You need to be aware that you could be dealing with lead paint. If so you should check into proper removal of that type of paint. I bought a lead test kit at my local home improvement store and tested the paint on the door. It didn’t contain lead so I didn’t have to worry about that.)
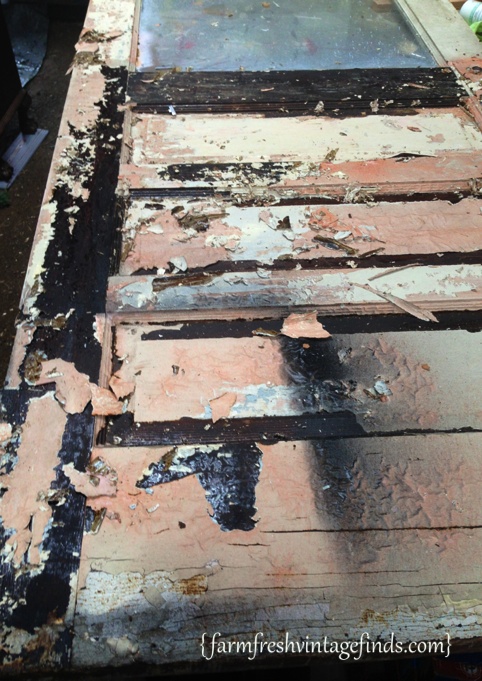
Moving on. As you can see this bad boy had seen its better days. It was covered in ugly.
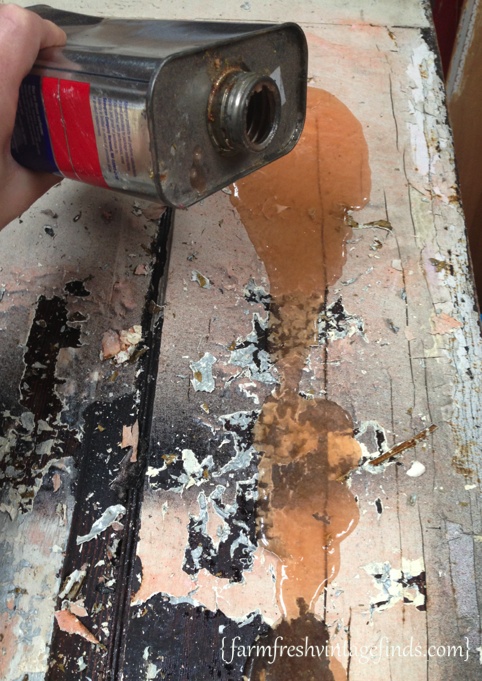
I usually just pour the stripper onto the surface I’m stripping as you can see above. Also I didn’t wear gloves during this process and that why I told you to wear them because stripper on your skin HURTS. Don’t be a stupid-o like me WEAR GLOVES!!!
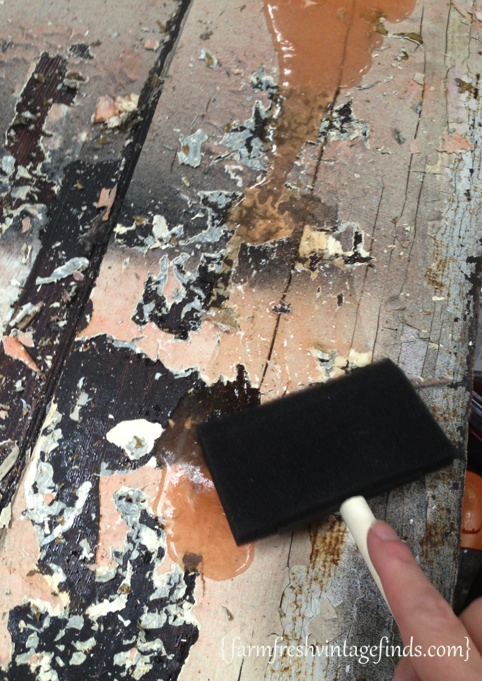
I used a foam brush to spread the stripper around.
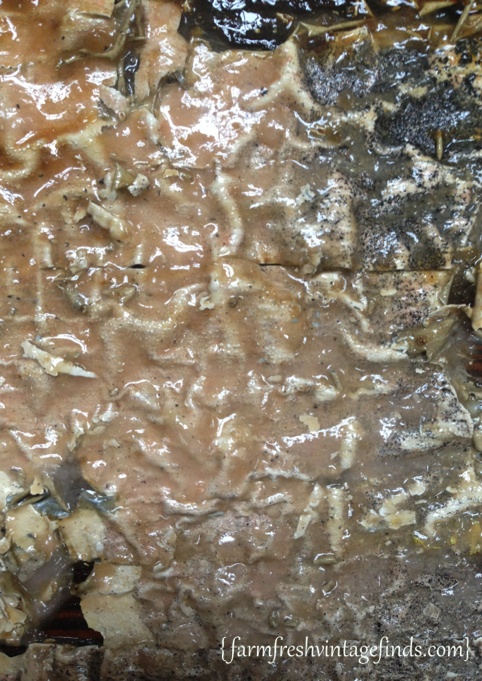
I then walked away and left it alone. This is want I found when I came back an hour or so later. The paint had bubbled beautifully and was ready to be scraped off.
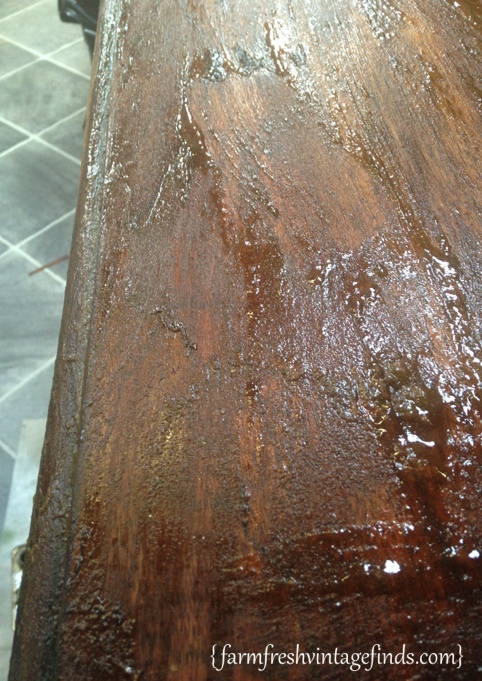
This is a photo of a chest that I stripped recently. The stripper had been on it for about 20 minutes when I took this picture. As you can see it starts to work fast but remember you don’t want to get anxious and take it off too soon. Let the stripper do the work for you.
Ok I think this is a good place to stop for now. Let’s all let our stripper do its job while we go have a cup of coffee shall we? In the meantime let me know by commenting below if you have any questions and I’ll address them in the next post.
Until next time!
Beth
Linking up with Miss Mustard Seed here
You’re encouraging me to tackle my antique dining table. It’s in rough shape after years as a homework table.
“Grammys Quilt” you can do it!!!!
Thank you for that beginners tutorial. I have just recently began experimenting w/ restyling old wood furniture, mostly chairs so far 😉 Anyway, I am wondering: IF the item IS covered in lead paint, then how would you proceed? I do my work from my home (w/ quite a few children here) so I haven’t dealt with stripping off old paint yet – for that very reason (afraid to deal w/ lead based paint). Thank you for sharing your knowledge!
Thank you so much for posting this!! Cannot wait til your next post!! I am working on a beauty and have been looking for a good step-by-step!!!
Thanks for this post. I’m just a beginner and this step by step is invaluable and scary! Thanks!
I HATE stripping furniture! lol I just hate messing with chemicals. BUT I do love seeing the pretty wood underneath. My “go to” has always been Citristrip….when I have to strip…which isn’t often if I can help it! 😉
Nancy
All the info you’ve given us with tutorials has been invaluable. I can’t tell you how much I appreciate your talents and time putting all this info and photos on for us to see.
By all means everybody should use a mask and gloves, etc. I have to be careful even with cleaning products when I clean our bathroom, the vapors really get to me, have to wear mask especially during winter when windows can’t be open. I got pretty sick one time just from cleaning bathroom with MR. Clean. I have asthma, so have had to learn to be very careful. Thanks again for your guidance.
You’re so welcome and that’s so true about wearing a mask and gloves. I cleaned housed for a living for 15 years and I’m now VERY sensitive to chemicals. Thanks for letting me know this was helpful to you.
Blessings,
Beth
Your tutorial is exactly what I have been looking for! I just have a question about the best way to remove the stripper once it has been on long enough and done it’s job. I have tried it and thought there must be a more orderly way to do it! I made a complete mess! What do you use to remove it? THanks!
Hi Kristi,
It really is messy. I usually use a putty knife and just scrape all of the big stuff into a disposable container. Then wipe it all down with mineral spirits to get the smaller stuff. I hope this helps! Thank for your comments and for reading.
Blessings,
Beth
I have a solid wood end table that I purchased and it’s in pretty good shape, it’s never been painted, but I want to paint it a clean white for my daughter who’s expecting in December. I don’t want the chalky look or anything, I just want white and maybe do a little stencil. I’ve never worked with furniture before, I usually stick to my sewing machine, lol. What would you recommend to be the best way for me to go about this? All of your things are so beautiful!
Hi Candy,
Thank you. I’m not sure why you don’t want to use chalky paint but I would suggest using Debi’s Design Diary Chalk Type Paint because I use it regularly with great adhesion and no problems and you can seal it with patina which will keep it from looking “chalky”. If you want info about finding it locally look here- https://www.google.com/maps/d/viewer?mid=zw4qaTRhr_lU.kK3EHcE124u8 You can also purchase online on my site.
Thanks!
Beth
I want to paint and re-purpose an entertainment center. I’m not sure if it has a laminate coating or even if there is real wood underneath. It has some scratches that seem deeper in areas. Is there a way to tell. Thank you!
Hi Laurie,
What happens when you sand it? Usually laminate will start to crumble or be really hard to break through.
Beth