How to Strip and Refinish Furniture Part 3

Hello everyone! If you’ve been following this series on how to strip and refinish furniture here and here then you know that so far we’ve talked about how to apply and remove your stripper. Today we’re going to talk about sanding and prepping for stain or paint. But before we do that I want to rewind and talk for a moment about how to choose a piece to strip.
I started watching different “diy’ers” as a young child before they were called diy’ers. I spent lots of time watching This Old House on public television. But more than that I watched my dad and granddad tinker in their workshops making everything from dollhouses to full blown couches. Seriously…my dad built a couch when I was a kid for a giant van that he’d purchased that was basically an empty shell. He refinished the entire thing curtains and all! He then went on to purchase a camper that he basically gutted and remodeled. And my granddad built and handed out dollhouses like he handed out Wrigley’s Double Mint chewing gum at church on Sunday’s. Seriously no joke. As a high school sophomore I took a woodworking class and was angry that they’d only let me make it once. Not because there were cute boys in the class but because I wanted to learn to build things! Now don’t get me wrong there were some cute boys in the class but that really wasn’t the reason!
I’m telling you this because I want to make it clear that I didn’t just decide to buy some stripper and throw it on a piece of furniture and see what would happen. I watched and practiced and helped and watched some more for years before I decided to take the leap and work on mine or anyone else’s furniture. If you want to start a refinishing project, start small. Go to a thrift store and buy a small desk or nightstand that is solid wood and practice on it. Buy several and practice. Because practice makes perfect. Well, not really. That’s a lie in my opinion. Practice makes you better and better if you ask me.
Ok so back to work!
We’ve stripped and cleaned all the goo off with mineral spirits and we waited for our piece to dry out overnight from all the chemicals. Now we want to look over our piece and see if there are any areas that need to be filled or repaired. This piece had a pretty severe chip in the veneer so I knew it would have to be filled. I used stainable filler that I applied with a putty knife and let dry according to the package directions.

Now we’re ready to sand. There are several different kinds of sanders and I’m not going to go into all of them (that’s another post) but what I am going to tell you is that I’ve found one that I really like and it’s my go to for almost every project now.
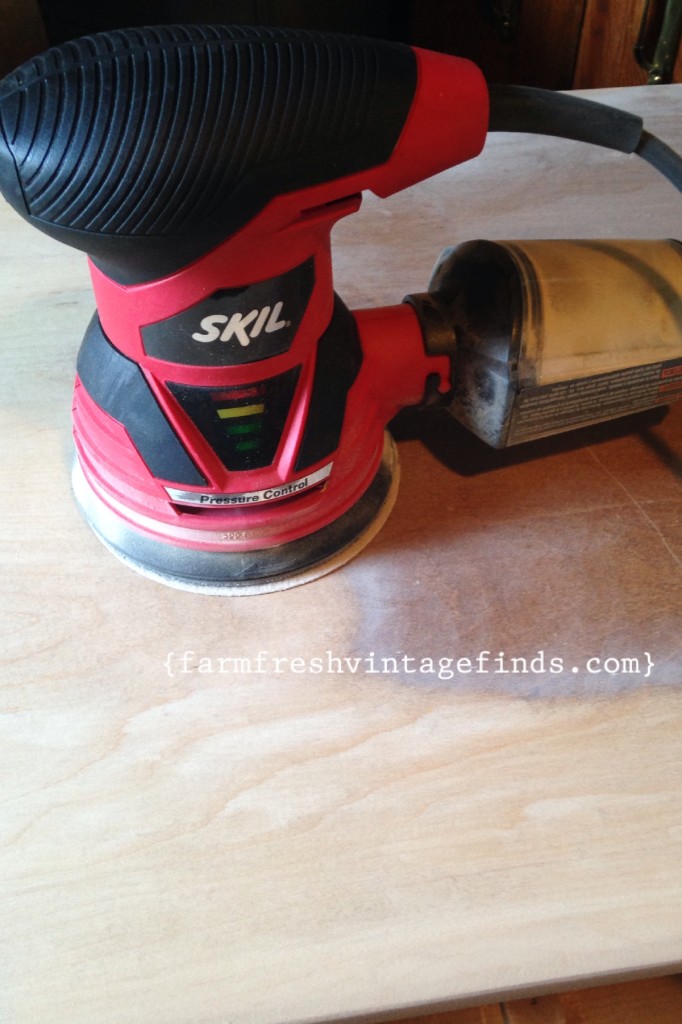
It’s made by Skil and it’s the truest orbital sander that I’ve found. I’ve used several “orbital” sanders and I like this one the very, very best right now. I say right now because I feel like something new and improved is always coming out so who knows when there may be something better.
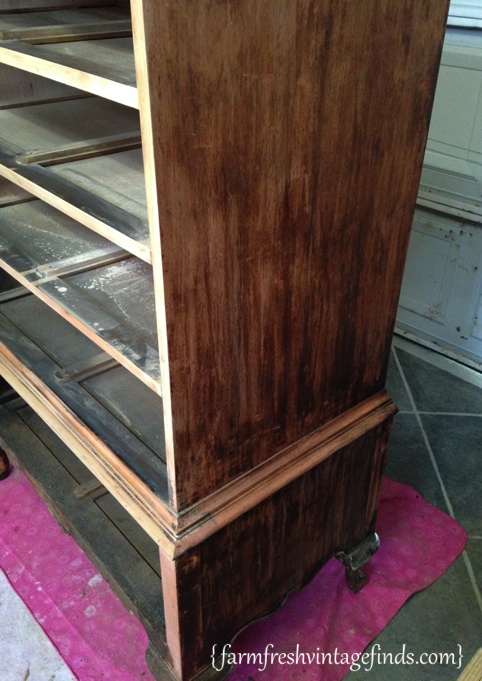
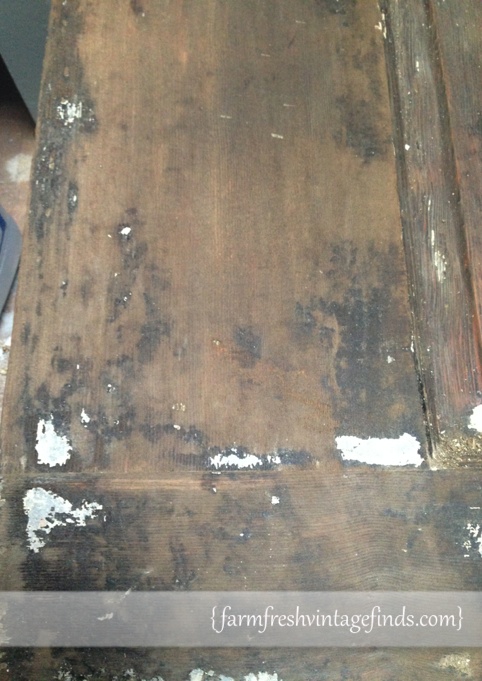
Ok your wood should look something like one of the photos above. It’s still got a little stain or paint here and there but you’ve gotten the paint or stain 85% removed.
Now this is were the work begins….what? you thought we’d already done some work? Ha! Brace yourself. Sanding is a lot like stripping….it’s TIME CONSUMING and can not be rushed! Don’t try to rush your sander!!! You can’t rush your sander. It’s going to do its job but you have to be patient with it.
Sandpaper is numbered with the highest number having the gentlest grit and the lowest having the roughest. Start with the roughest grit of sandpaper first and then graduate to the next (gentler) grit and the next. I like to do this three times. Beginning with an 80 grit (60 if you’ve got something really gnarly to sand) and then go to a 120 and then to a 220. There are lots of opinions on this. Remember I’m telling you what works for me.
Using and orbital sander like the one mentioned above you are going to work your way all over the piece. Remember not to hold the sander in one place for too long so as not to create a dip or burn in the wood. Also make sure and apply even pressure so you don’t create ridges or humps in the wood.
Now there will be areas on every piece that you sand that are going to be too small for your sander and require you to hand sand them. When you do this I can not stress enough how important it is to WORK IN THE DIRECTION OF THE GRAIN OF THE WOOD. If you go against the grain you are going to create scratches. Not good. Not good at all.
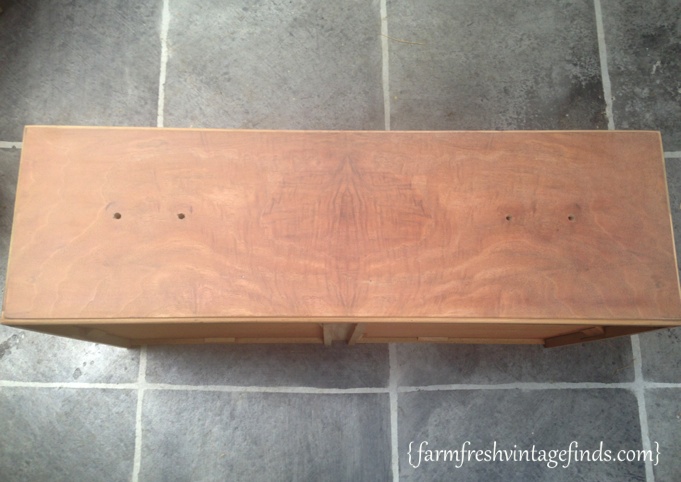
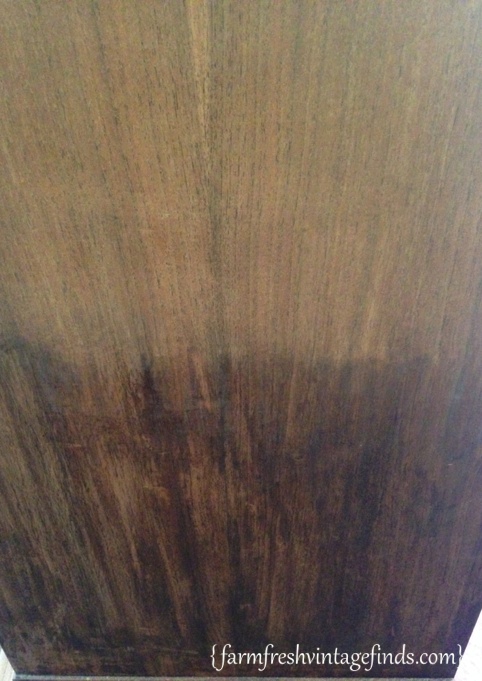
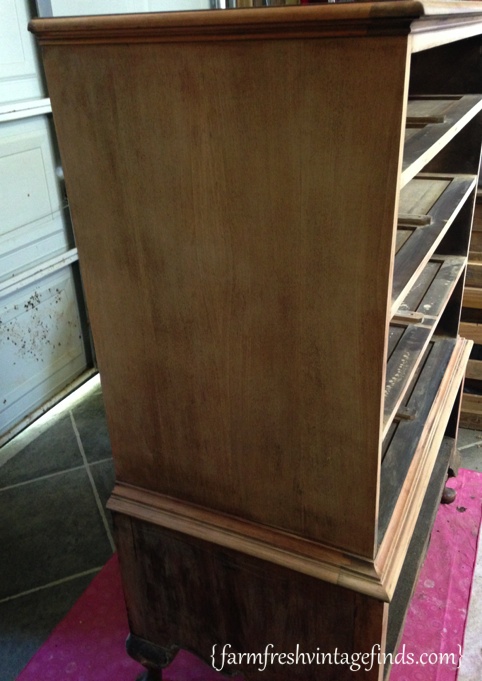
Now when you are all done sanding you are going to be looking at this. Beautiful, wonderful, natural wood.
This seems like a great stopping point. You’ve worked hard….go have a cup of tea or glass of wine. You’ve earned it! In next weeks post we’re going to finish prepping and start staining and sealing. You don’t want to miss it!
Be sure and leave your questions and comments so I can answer them. Thanks for reading and have a great day doing what you LURVE!
Blessings,
Beth
This series is great! I really appreciate you sharing your insight and experience. Will you be doing a Part 4? My naked side table could use a little help “getting dressed.
I sure will Charlene. Hope to have it up tomorrow. :). Thanks so much!
Blessings,
Beth
How do you avoid swirl marks?
Hi Susan,
To avoid swirl marks you need to use a true orbital sander and step down your paper. By that I mean start with a heavy grit and then go to a finer grit and then a finer grit. I sand atleast 3 full times stepping down my papers. I hope this helps!
Blessings,
Beth
Lovely, lovey piece! The grain is beautiful. As usual, you did a fabulous job. Sooo pretty!
You might want to mention that Minwax wood filler is NOT stainable. Oh, I guess you could stain it, but it ends up looking like you filled something with brown bubble gum. I use Elmer’s or Behren’s, which actually does take stain.