How to Whitewash Plank Walls
Planks walls…they’re a BIG thing in decorating, right? And the whitewashed plank walls, well they’re my fav-o-rite!
Plank walls are super fabulous. And I am completely head over heals for them. The texture, the varied colors, the instant architectural detail. All of it makes me happy.
So when Prince Charming and I decided to convert a space in our home into a family/game/multipurpose room I knew I had to have some plank something. I scoured the internet to find just the right thing and was super thrilled when I discovered that Lumber Liquidators had just what I needed. You can read all about how I (with the help of my fabulous daughter) installed the planks here.
But for todays post I want to show you how we finished it all out and tell you it wasn’t all candy and roses….initially.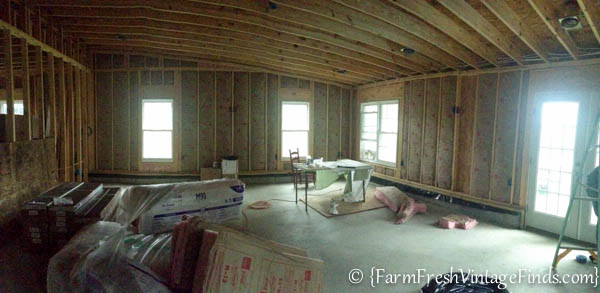
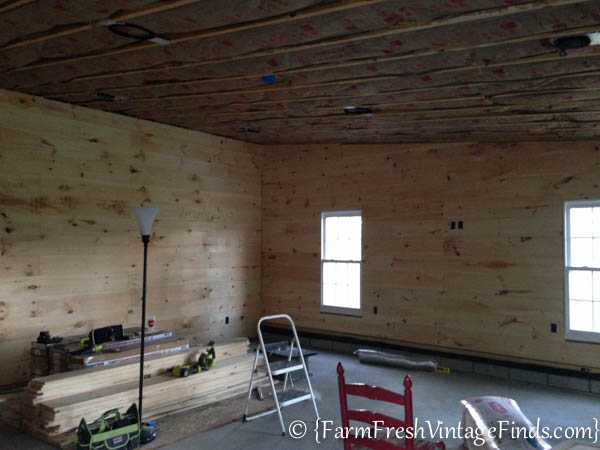
Just to recap this is where we started, blank canvas of an unfinished room with just studs no drywall.
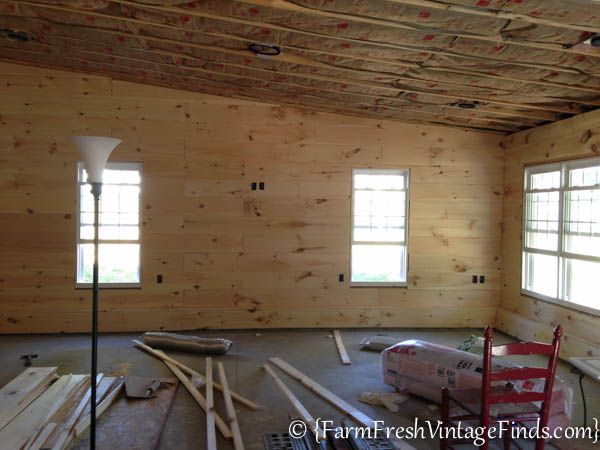
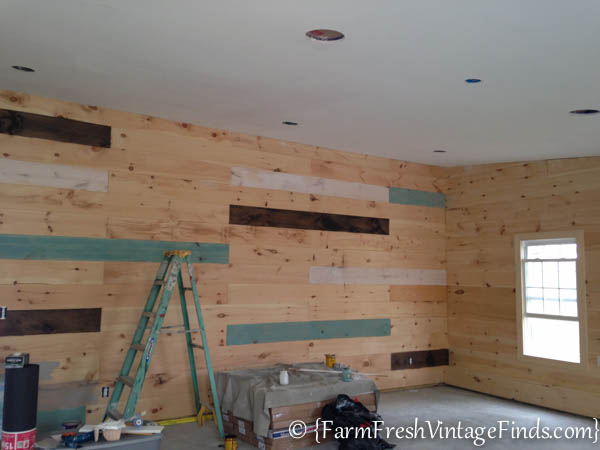
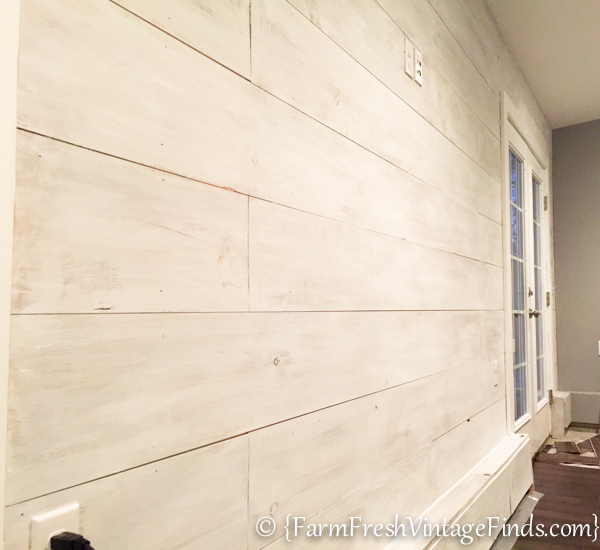
This is how it looked after my daughter and I installed the planks. Prince Charming helped to but we got a really good jumpstart on him.
I have to admit, I did like the look of the raw planks on the walls. And I did consider leaving them that way but I knew I’d only be happy with them for a short time. Because my heart was always to have a whitewashed plank room.
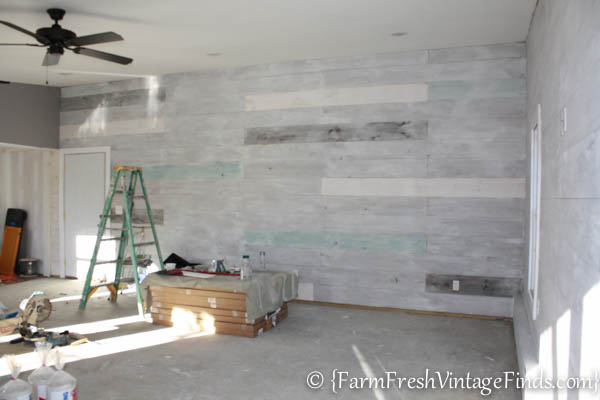
So I went for it! I had this vision in my head (be afraid when I say that) that I wanted a random pattern on the main wall. This wall is sort-of the backdrop of the whole room. It only has one door on the side and is right at 13′ tall. For this old farmhouse with low ceilings that’s tall. I really wanted it to stand out and be different.
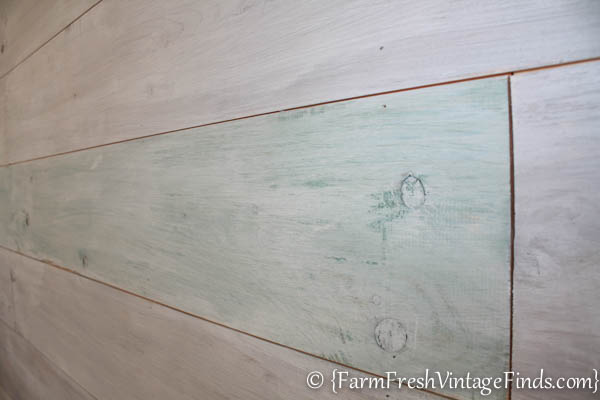
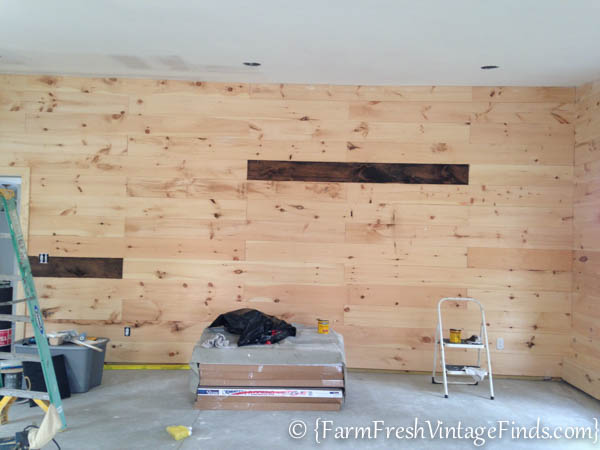
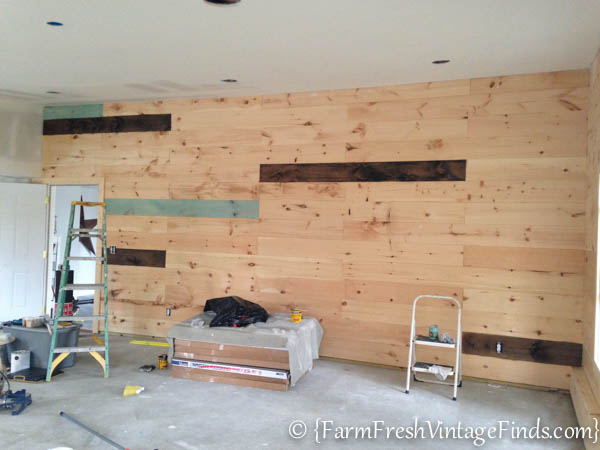
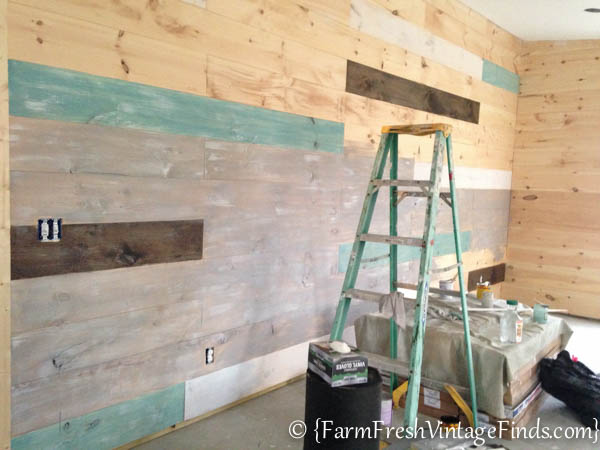
I started out by staining a few random boards with dark stain and then thinned some turquoise paint down and painted a random pattern.
Next I took white paint and painted a few boards with it.
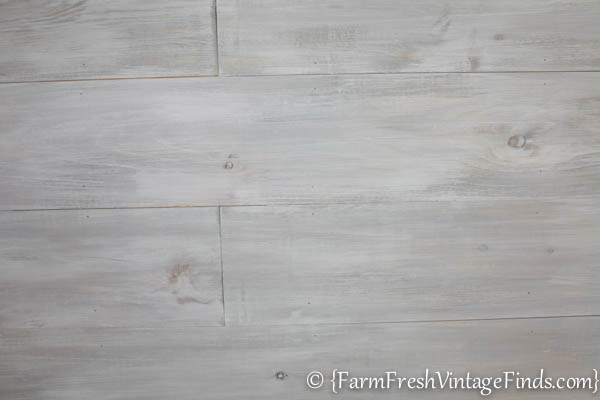
Next I used diluted gray paint over all the remaining boards.
After that I went over the entire wall with diluted flat white paint, basically dry brushing it on until I got the coverage I wanted.
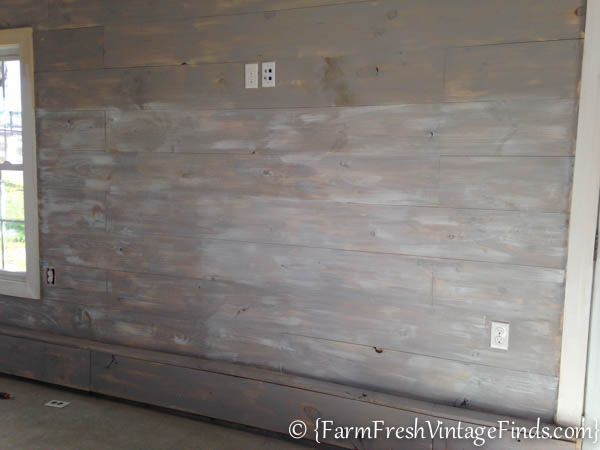
I continued around the rest of the room painting the planks gray first and then whitewashing over the top of the gray.
It took me a SOLID WEEK!!!! I’m talking 10 hour days people! I am a super fast painter but this job kicked my tail. And remember how I told you that everything wasn’t candy and roses? Well, at one point when Prince Charming came home from work he wasn’t so charming. He….he HATED it!!!!
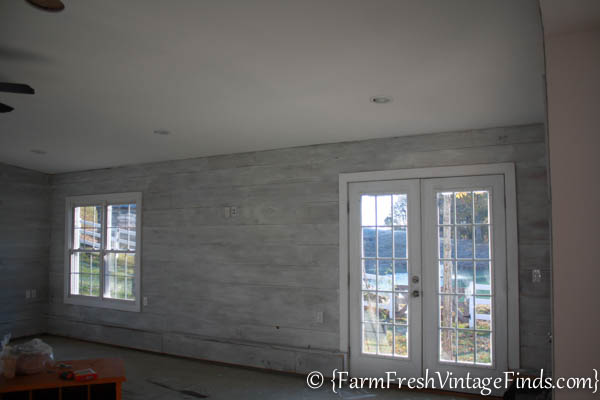
Not just honey, I really don’t like that but HATED it! And as you can see in the photo above, it didn’t look good. That was the point I almost threw in the towel, said tear it down and we’ll just drywall it. But then I had a cup of coffee, pulled myself together and pressed on, adding more white and finally got the look we wanted.
It wasn’t easy. Dare I say it may be the most labor intensive technique I’ve ever done. Hand painting each board took time and was exhausting. I just couldn’t get the look I wanted with a roller, believe me I tried. But in the end I was able to pull it all together. When I walk into this room now I feel a great sense of accomplishment. That feeling you get when you wanted to give up but you didn’t. And now that it’s all done Prince Charming LOVES it as much as I do. And that my friends is what it is all about!
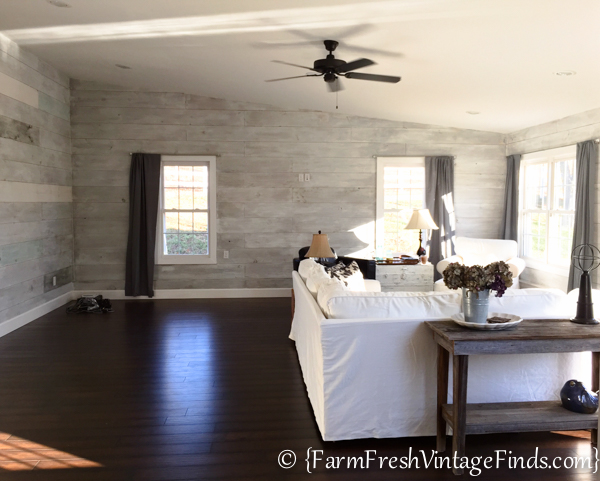
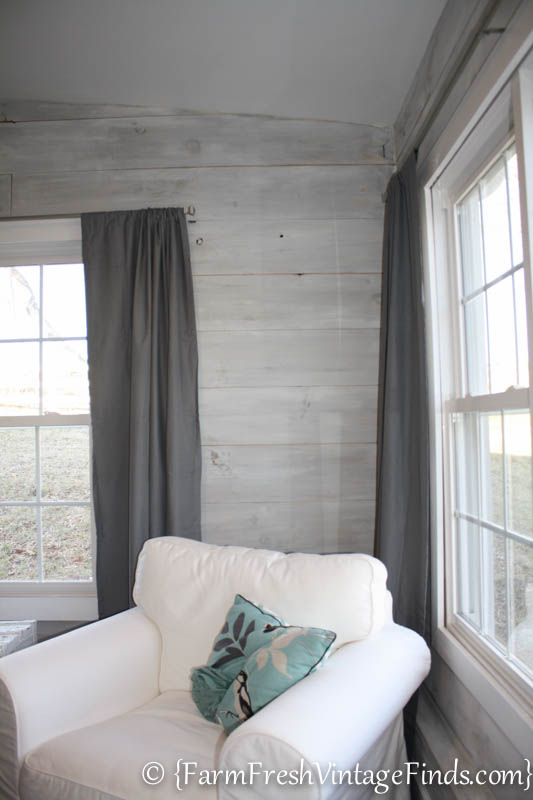
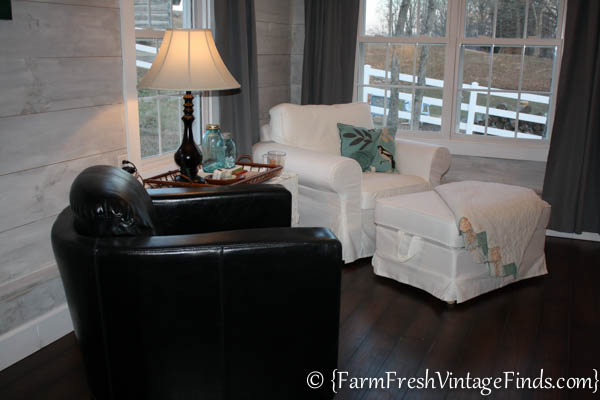
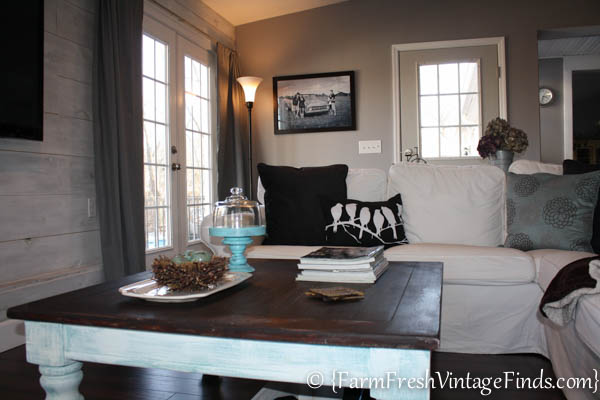
Now I’ll let you guys enjoy some finished pictures while I go take a nap! So here it is….whitewashed plank wall bliss!!!!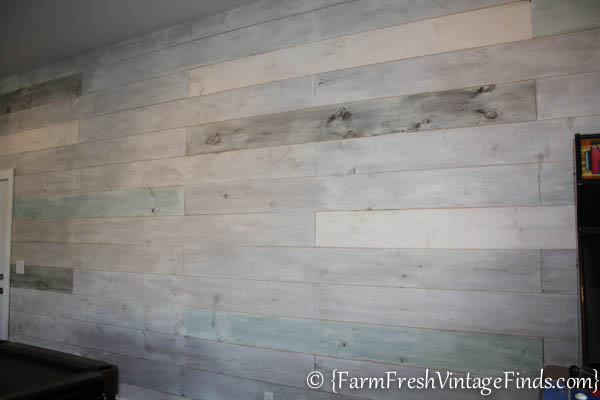
Thanks for being here! I’ll see you next time!



That is stunning! You deserve a nap!! I am impressed and I love it, great job….I sure wish I lived closer to you.
Thank you so much Sally!!!!
It is BEAUTIFUL!!! I have to admit, the first few pictures had me thinking you had made a big mistake!! I didn’t like it either. But the finished room is gorgeous and I love the technique you used. Wow, what a job!!! Get some rest.
Thanks Sue….I had a plan all along. It just took awhile to bring it all together. 🙂
Wow! What a HUGE job! I am so glad you hung in there and tweaked it until you love it. It turned out great! Woo hoo! 🙂
Thanks Julie! Me too!
It came together great! That’s a lot of work, but beautiful and worth it!
Debbie
Thanks Debbie!
It looks great, Beth! The room is beautifully decorated too and I could sit there for hours. LOL,
Thanks Vanessa!!!!
I love the walls and adding a few colors randomly was such a neat idea! I remember when you started with the walls. LOVE the plank walls.. I want some too!
Thanks Wendi!!!!
Beth, my favorite of all the DIY projects I have looked at. You are so talented, and we are neighbors.
Thank you Barb! So glad to have you here.
Blessings,
Beth
We have a log home and I am trying to convince husband to let me do this to some of our spaces but he isn’t on board yet:( I am tired of looking at the same pine logs 12 years later….. This room is so peaceful and warm. love it!
Thank you Melissa. Good luck convincing him. 🙂
I’m currently in the process of shiplapping our whole living room. The ‘raw’ planks are now up, and it’s time to decide whether I’m painting, whitewashing or staining.
What I’m wondering.. should I sand the planks? Did you?
LOOKS FABULOUS!
~Deb
Hey Deb,
I think it’s a personal preference. I didn’t sand mine but that kind of thing doesn’t bother me. If they had been super rough I would’ve sanded them but I didn’t feel it was necessary. Good luck with your project!!!
Thanks for reading,
Beth
I so enjoy reading your emails. Can’t wait until I can call you to come over to my house. You are a truly amazing woman.
Thank you so much Linda!