Building a Greenhouse with Old Windows
I’ve wanted to build a greenhouse for the last few years. But, between the shop, client projects, pouring candles and building our barndominium… there just isn’t enough time in the day. I love planting veggies and last year I had so much fun with my little granddaughter. Especially watching her eat tomatoes right out of the garden.
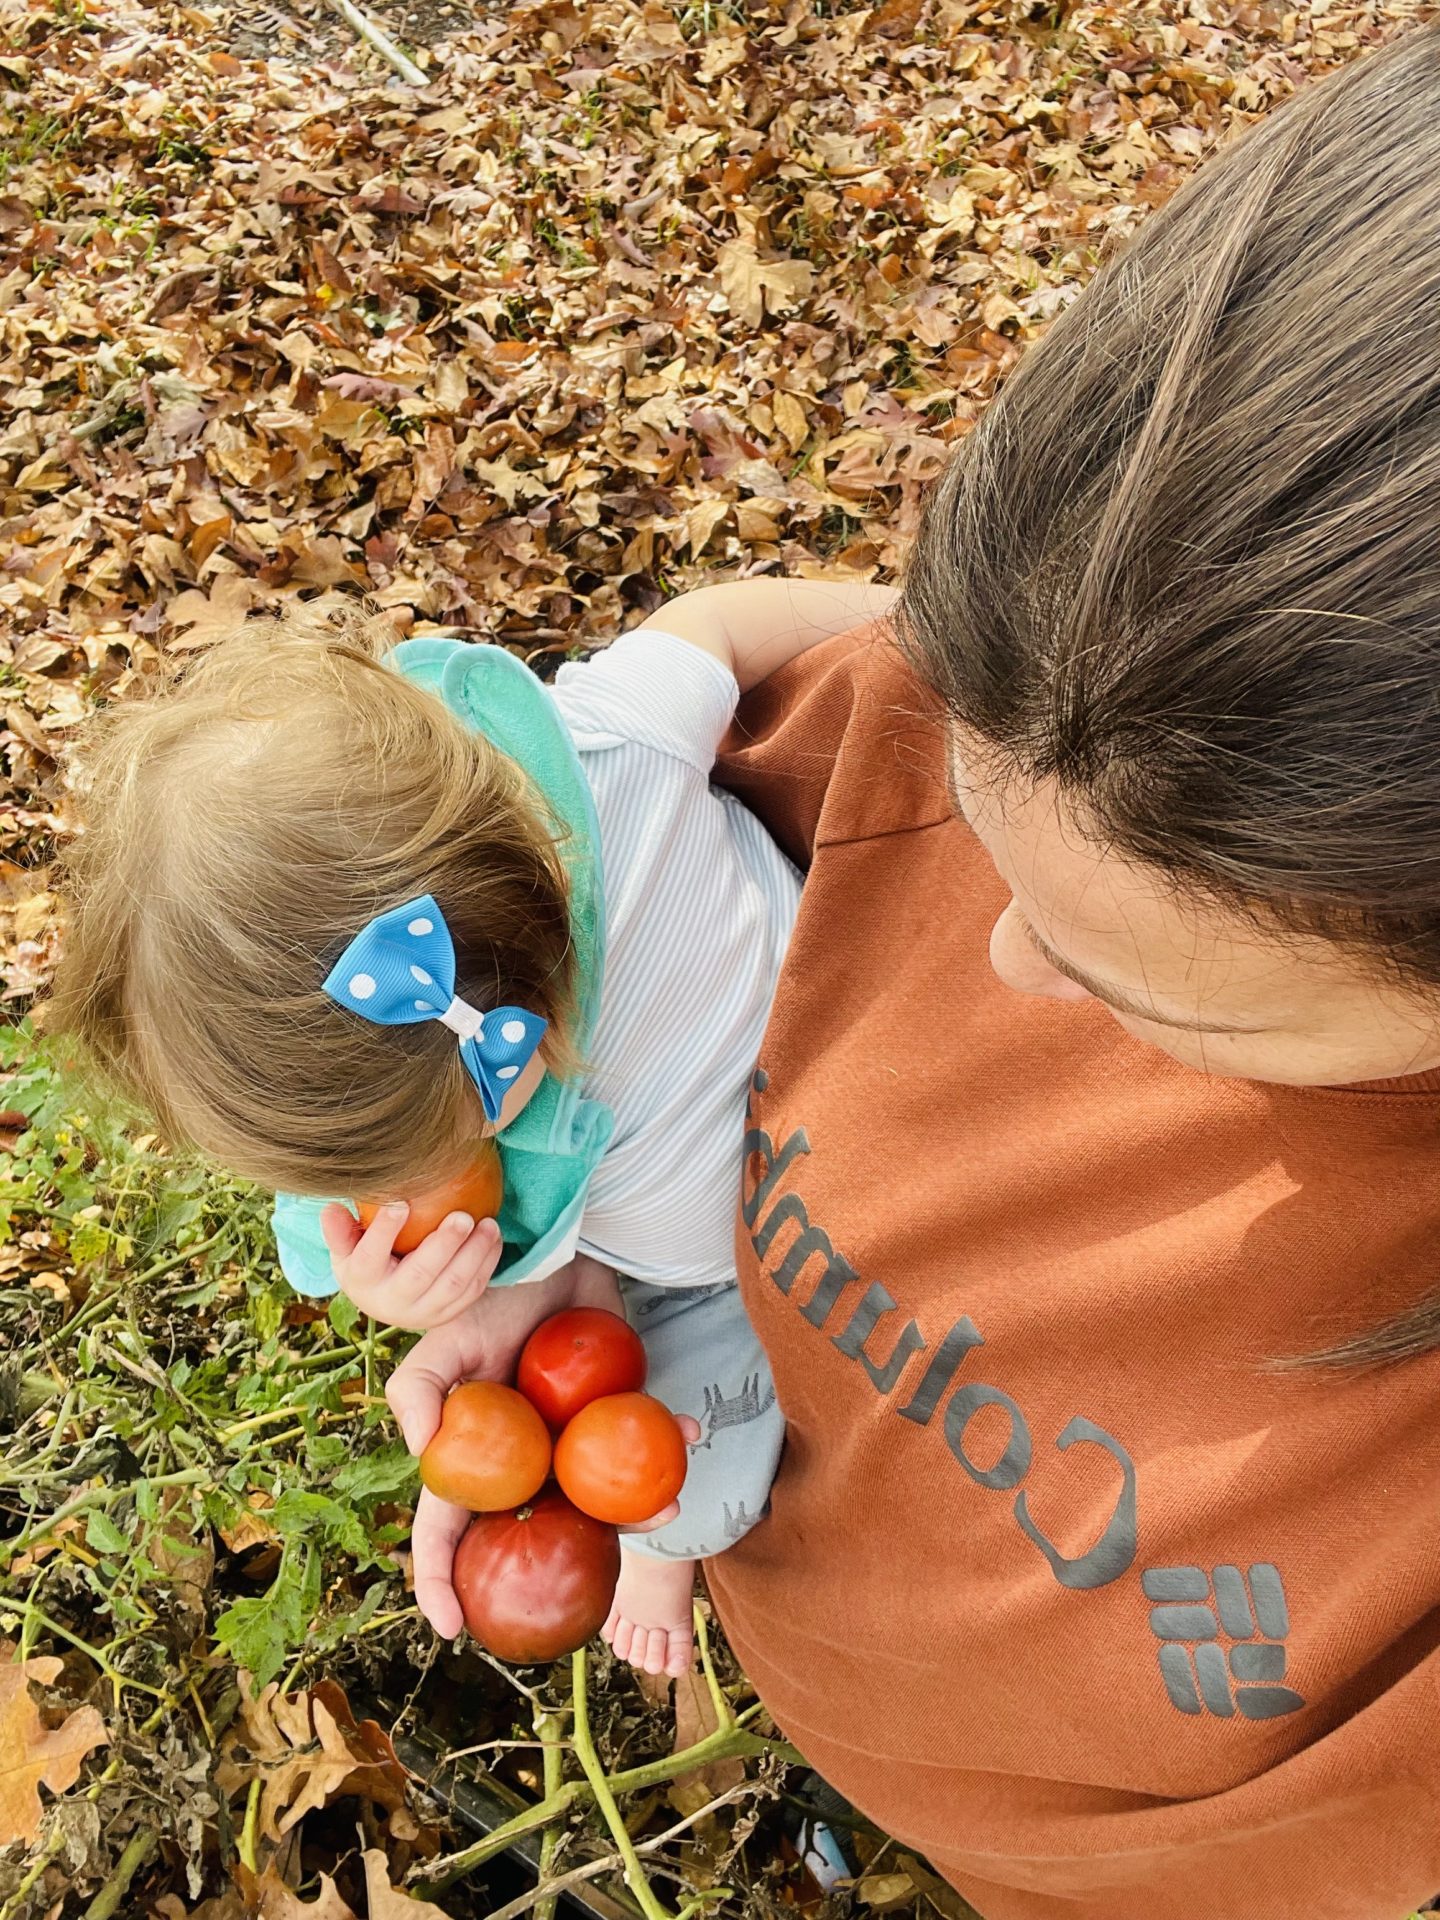
We have a growing family – three grandchildren now! While I don’t ever see myself as a full on homesteader, I eat McDonalds on occasion, I do like having fresh veggies. I don’t, however, want to go to the store everyday or wonder where they were grown. So this year, when it was time to start my seeds, I casually mentioned to Prince Charming that I really wished we had time to build a greenhouse. He looked at me and said, “Well, we better just do it.”
That’s typically how the conversation for new projects goes around here. One of us wants to do something, yet we know we’re overbooked with other things but we still decide to add it to our already overflowing plates.
Getting started
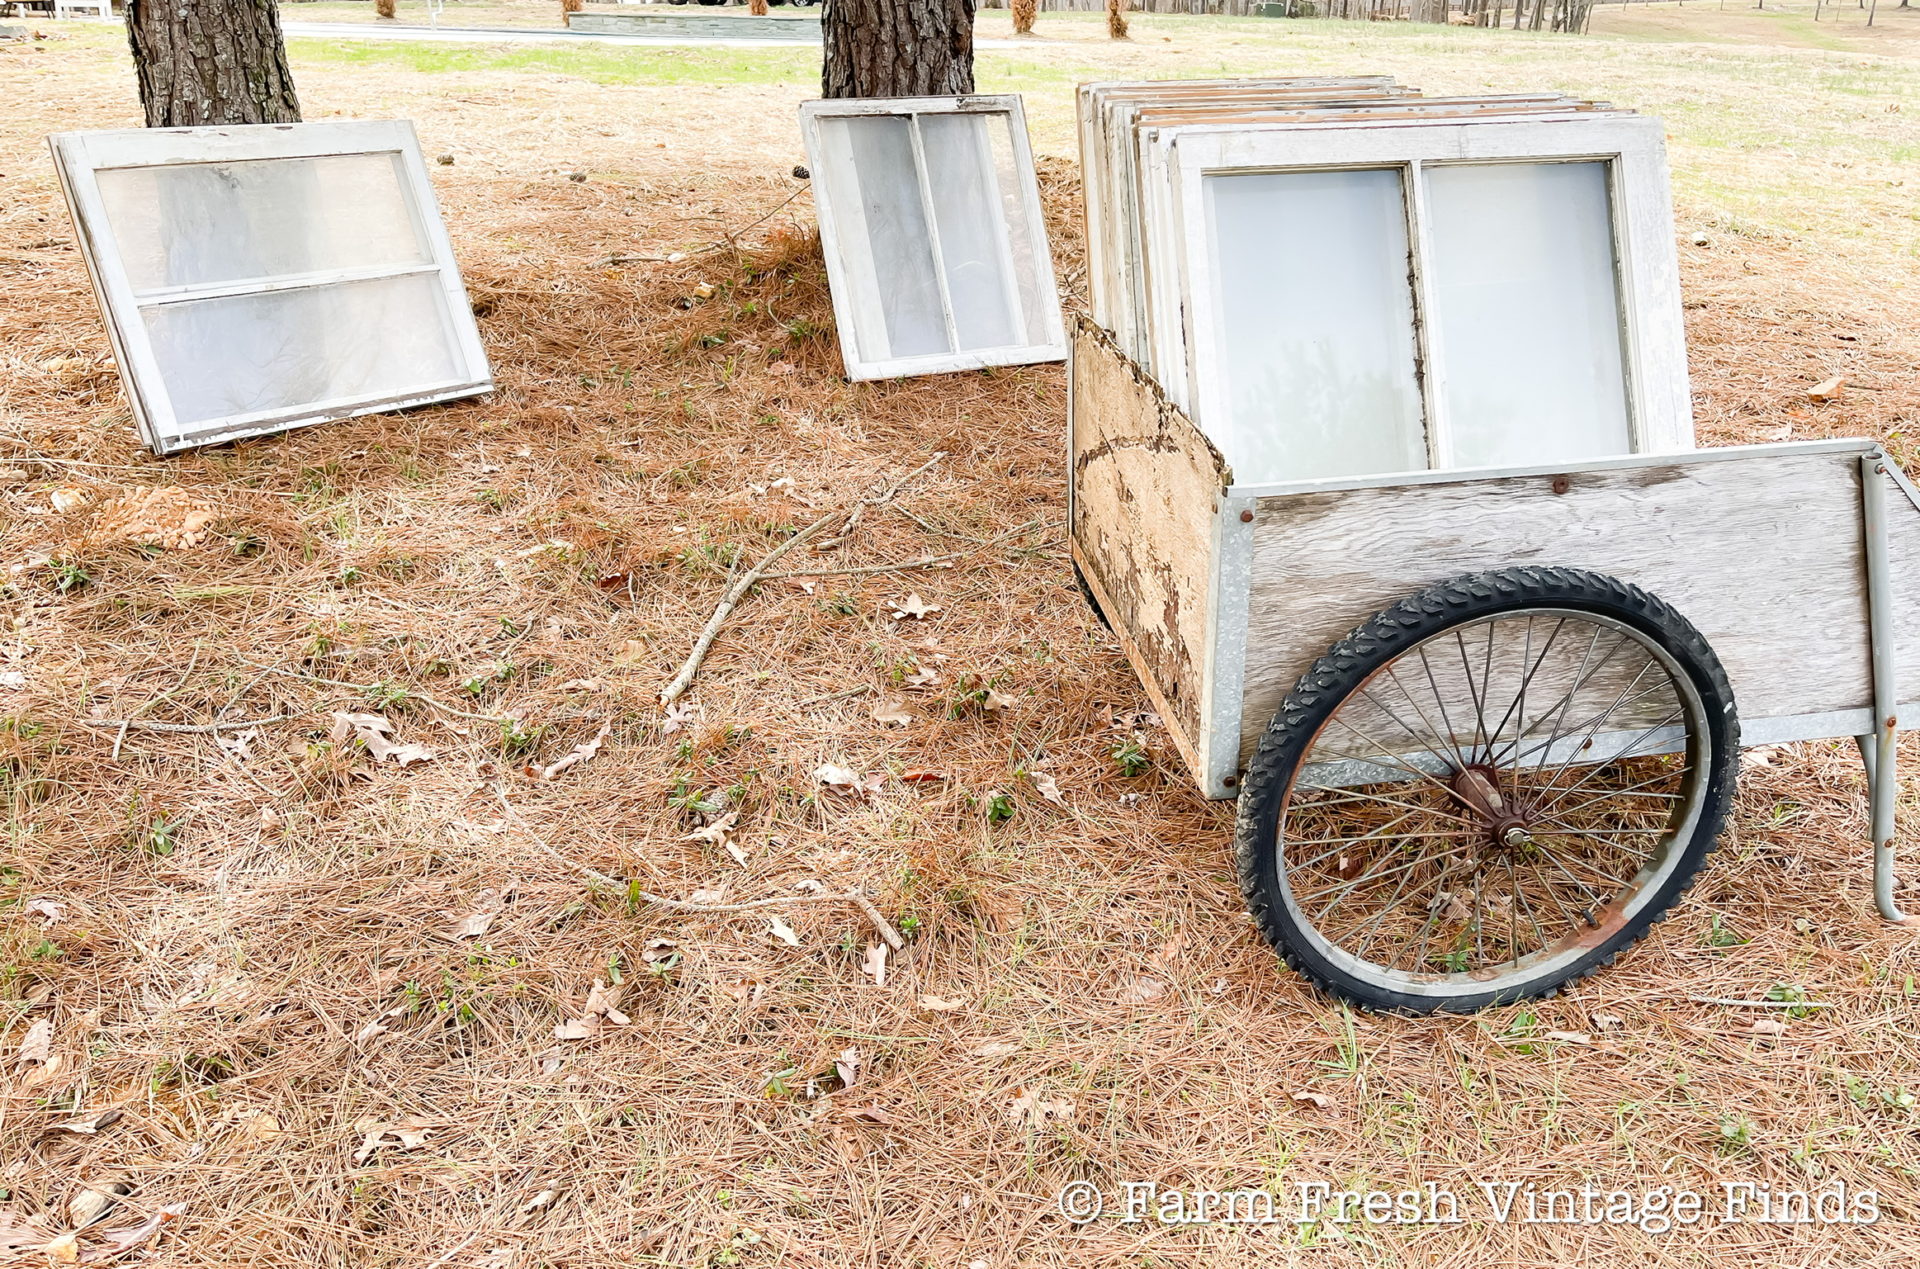
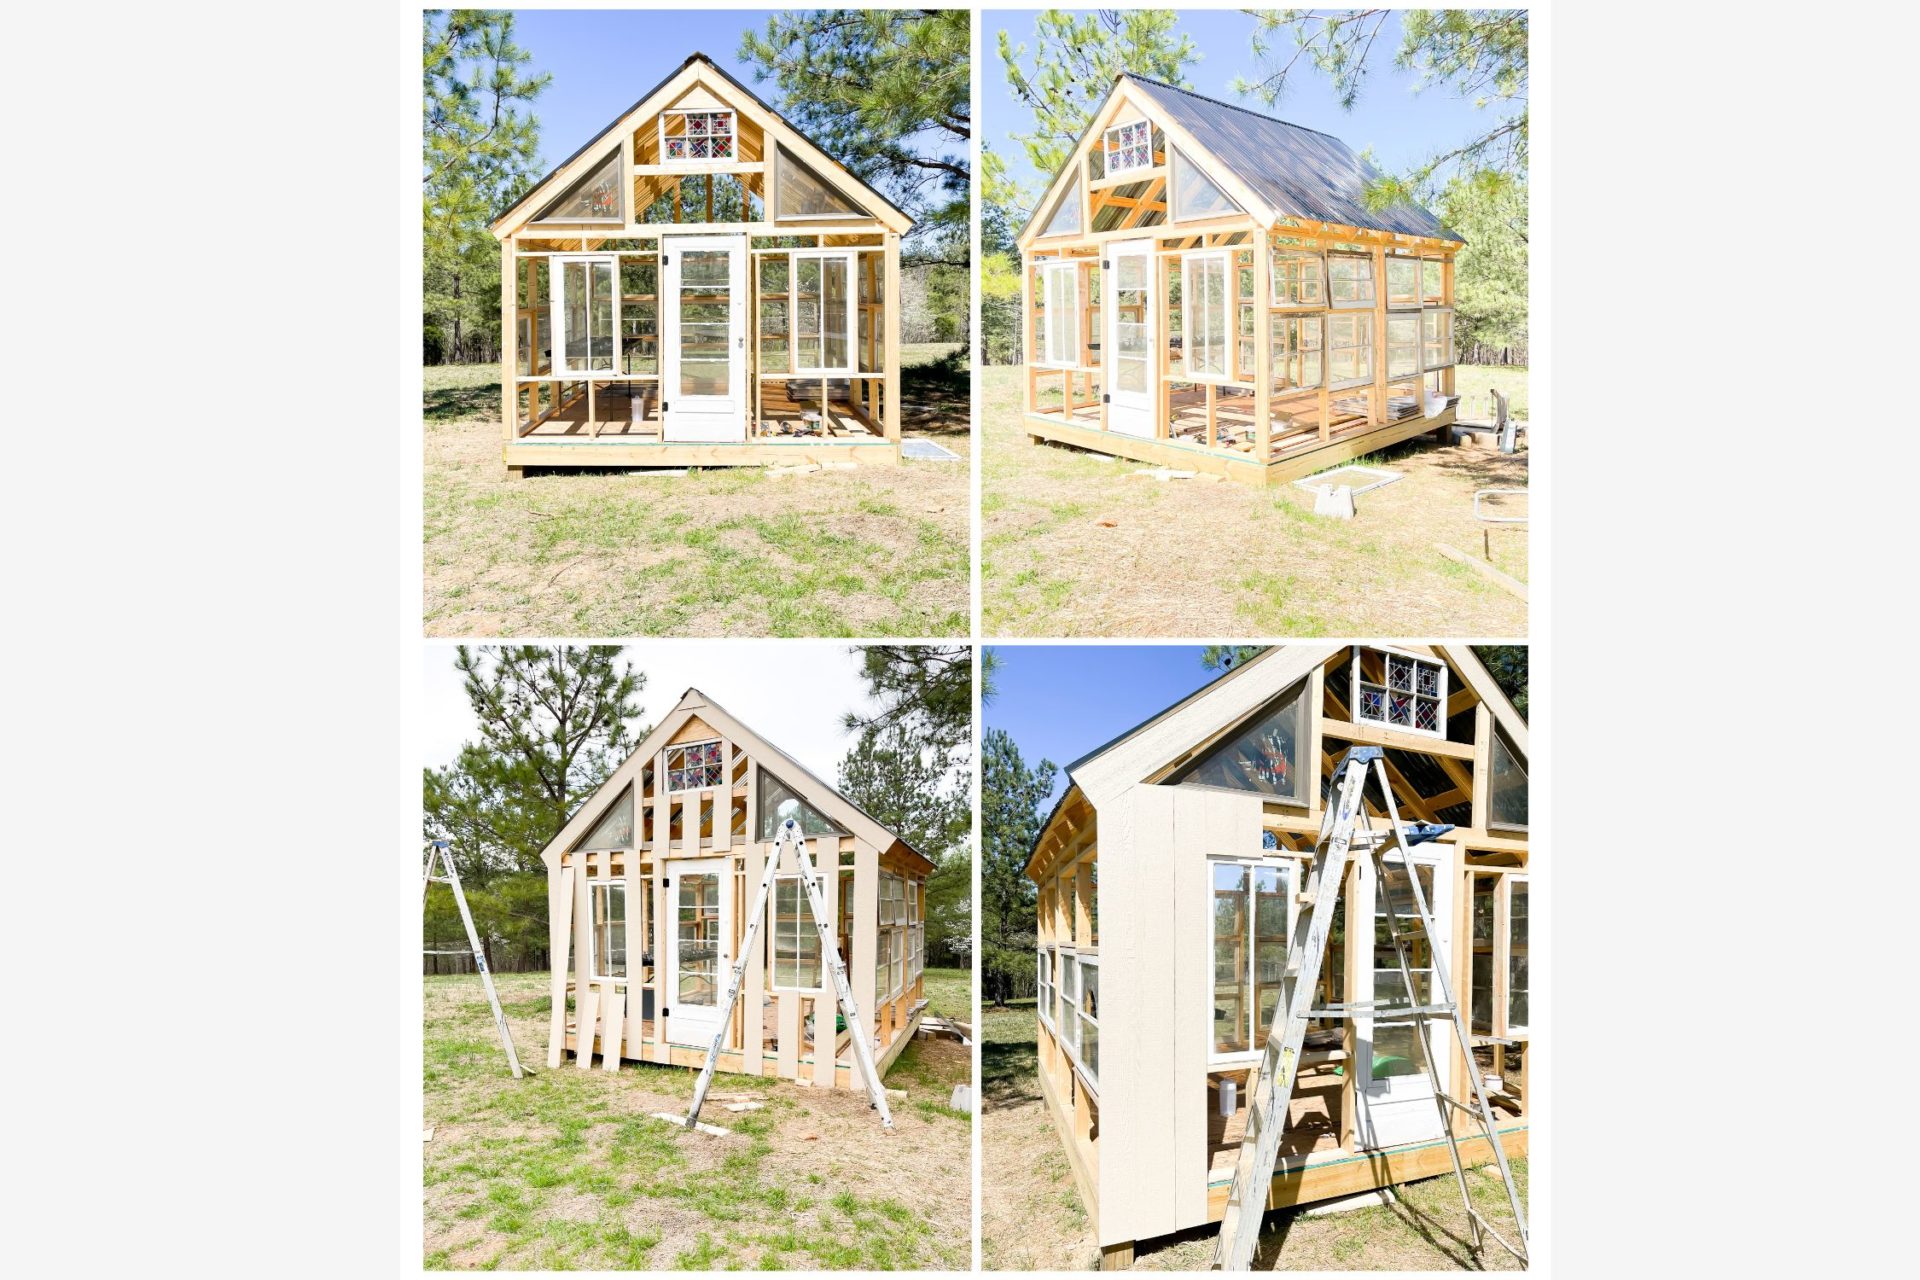
We had a fairly large collection of windows from Prince Charming’s grandparents house we remodeled after we moved from the farmhouse. (More on that story to come.) So I knew I wanted to use them. They have special meaning being from his grandparents home and I like making old things new. We also love using what we have.
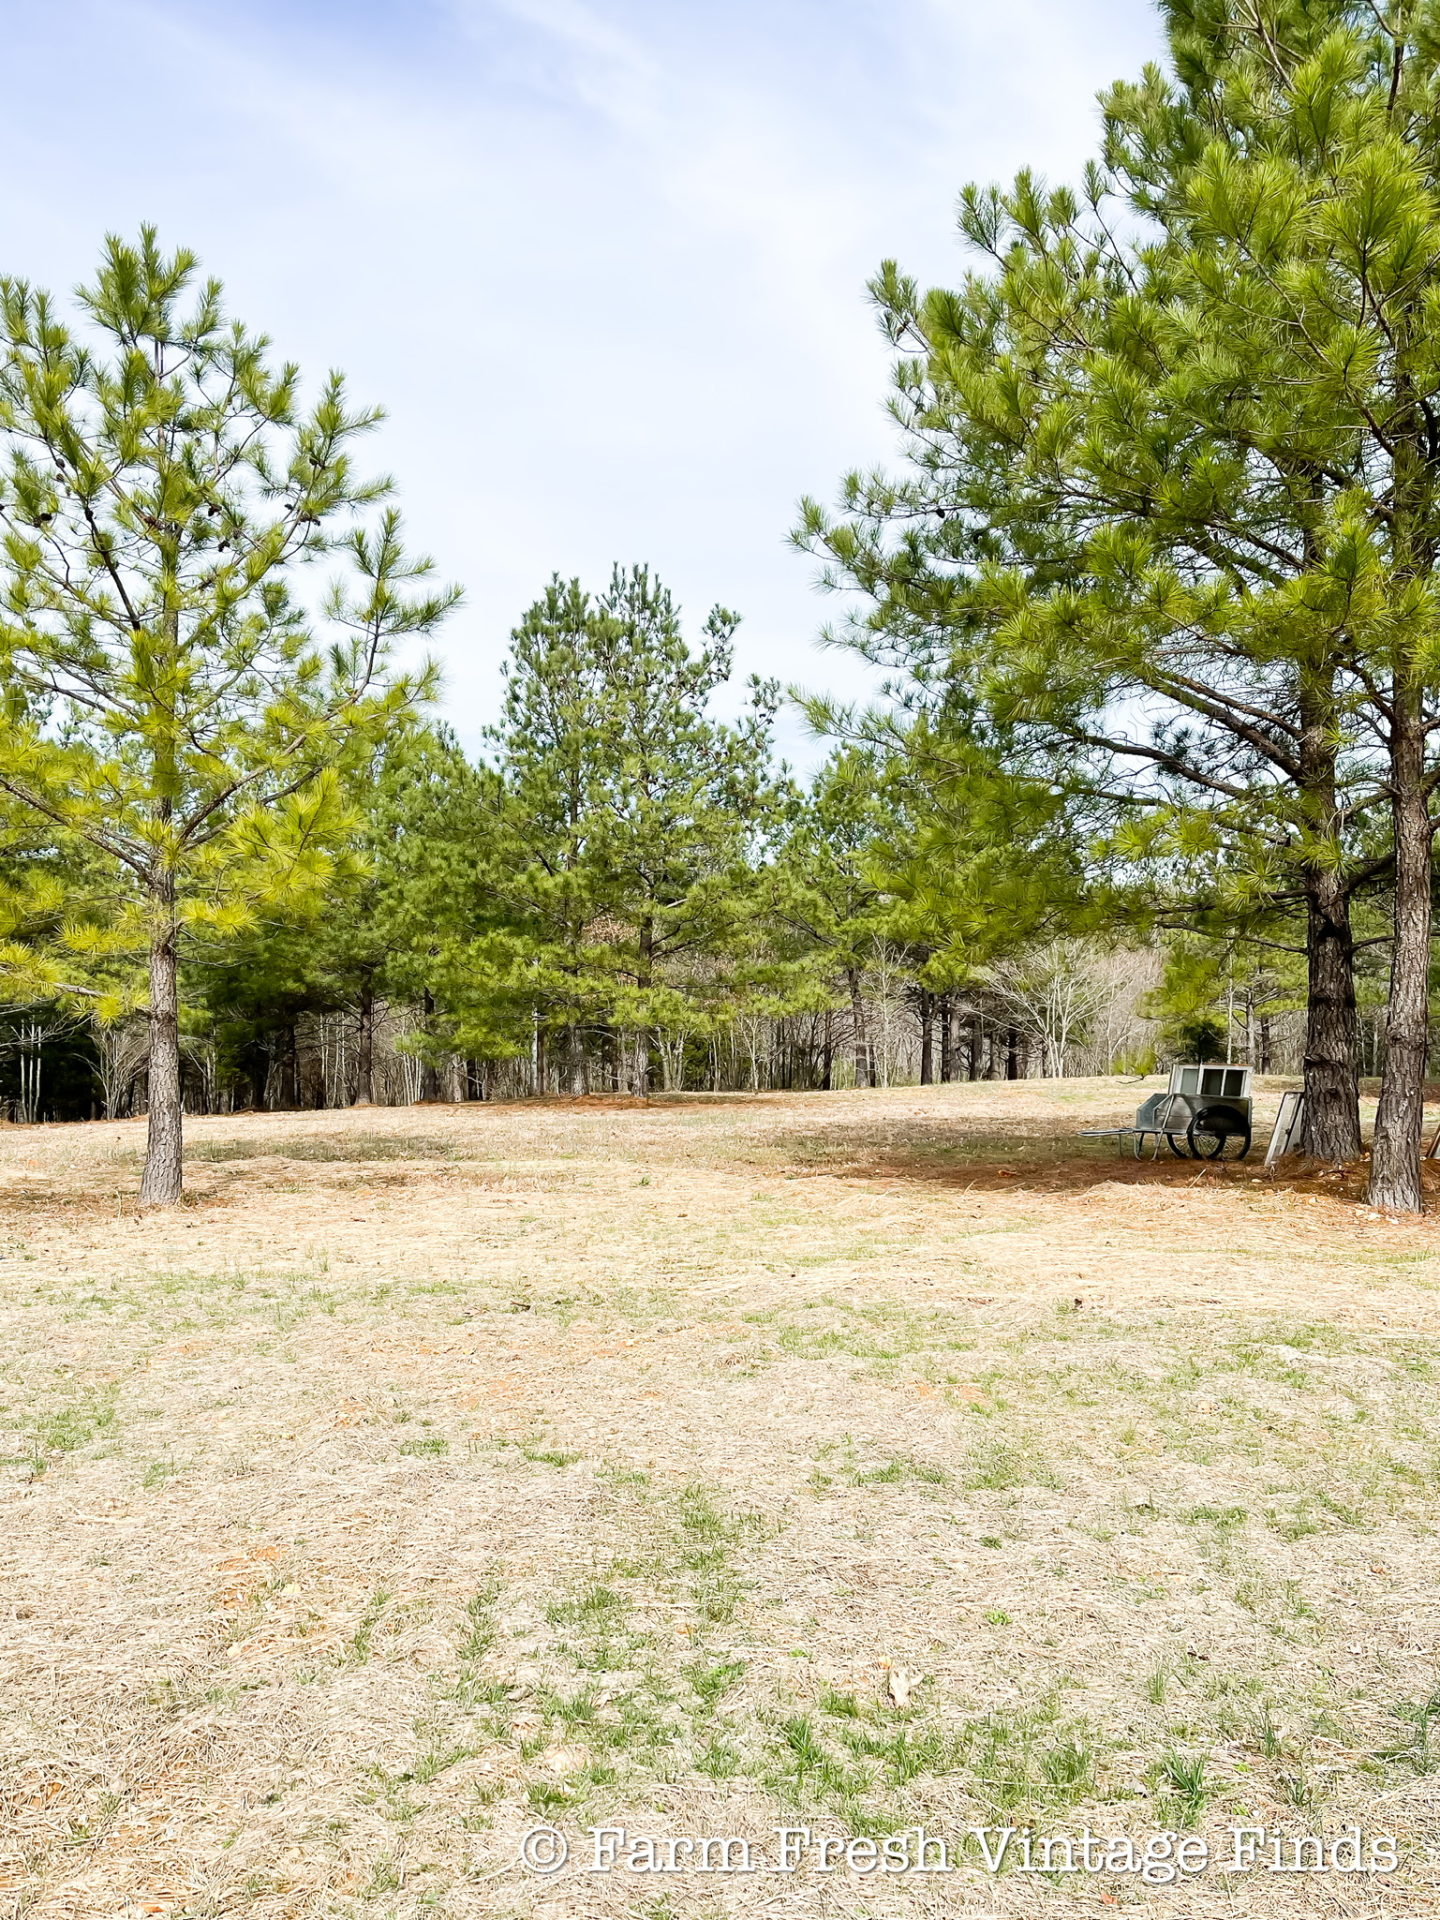
The first thing we wanted to do was find the perfect spot for the greenhouse. I did a quick google search about the best way to position a greenhouse, but I’m not going to lie to you and tell you the answer would have changed my mind if it had been different than where I wanted it. Ha!
Next,
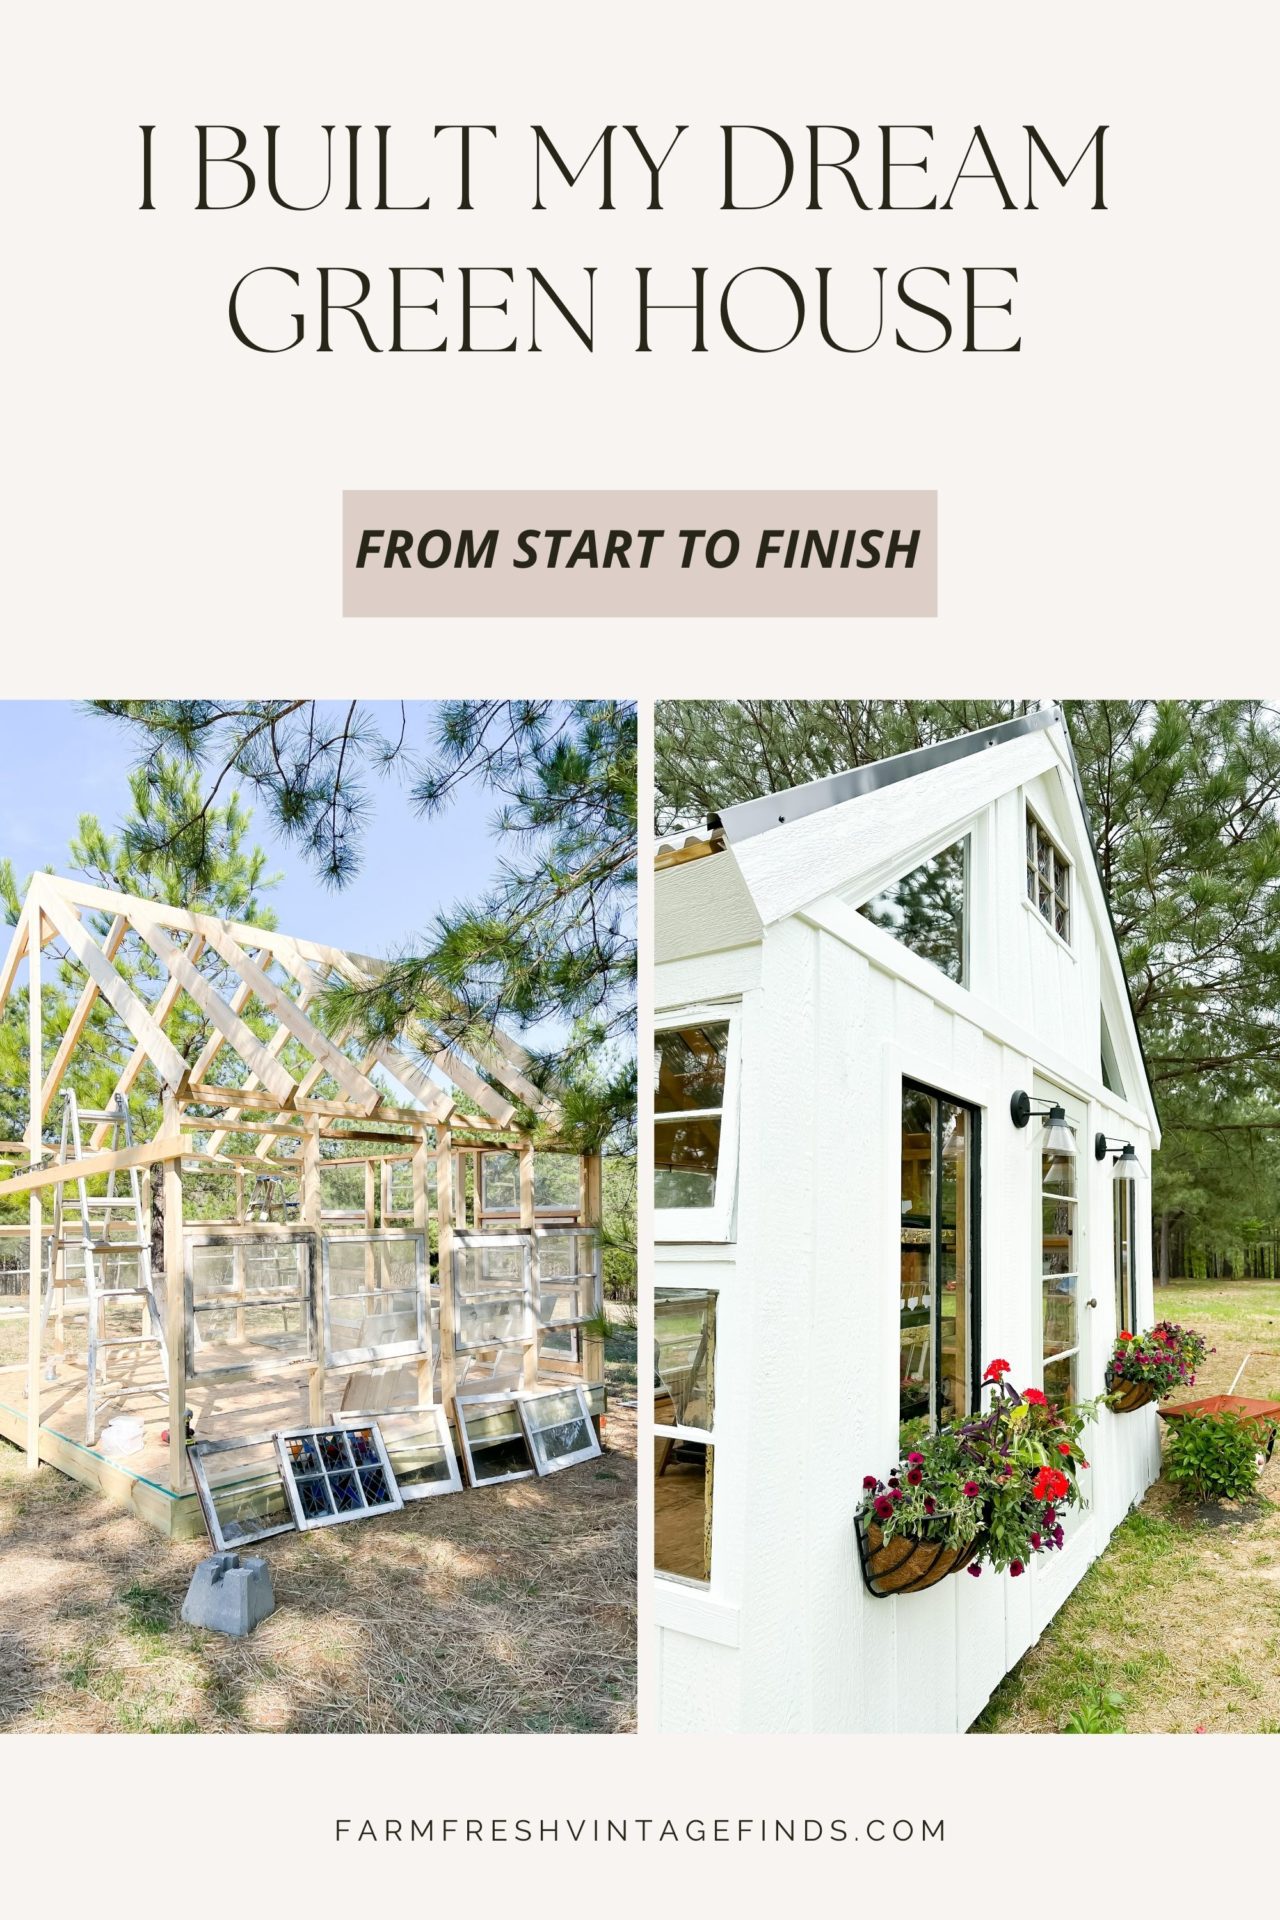
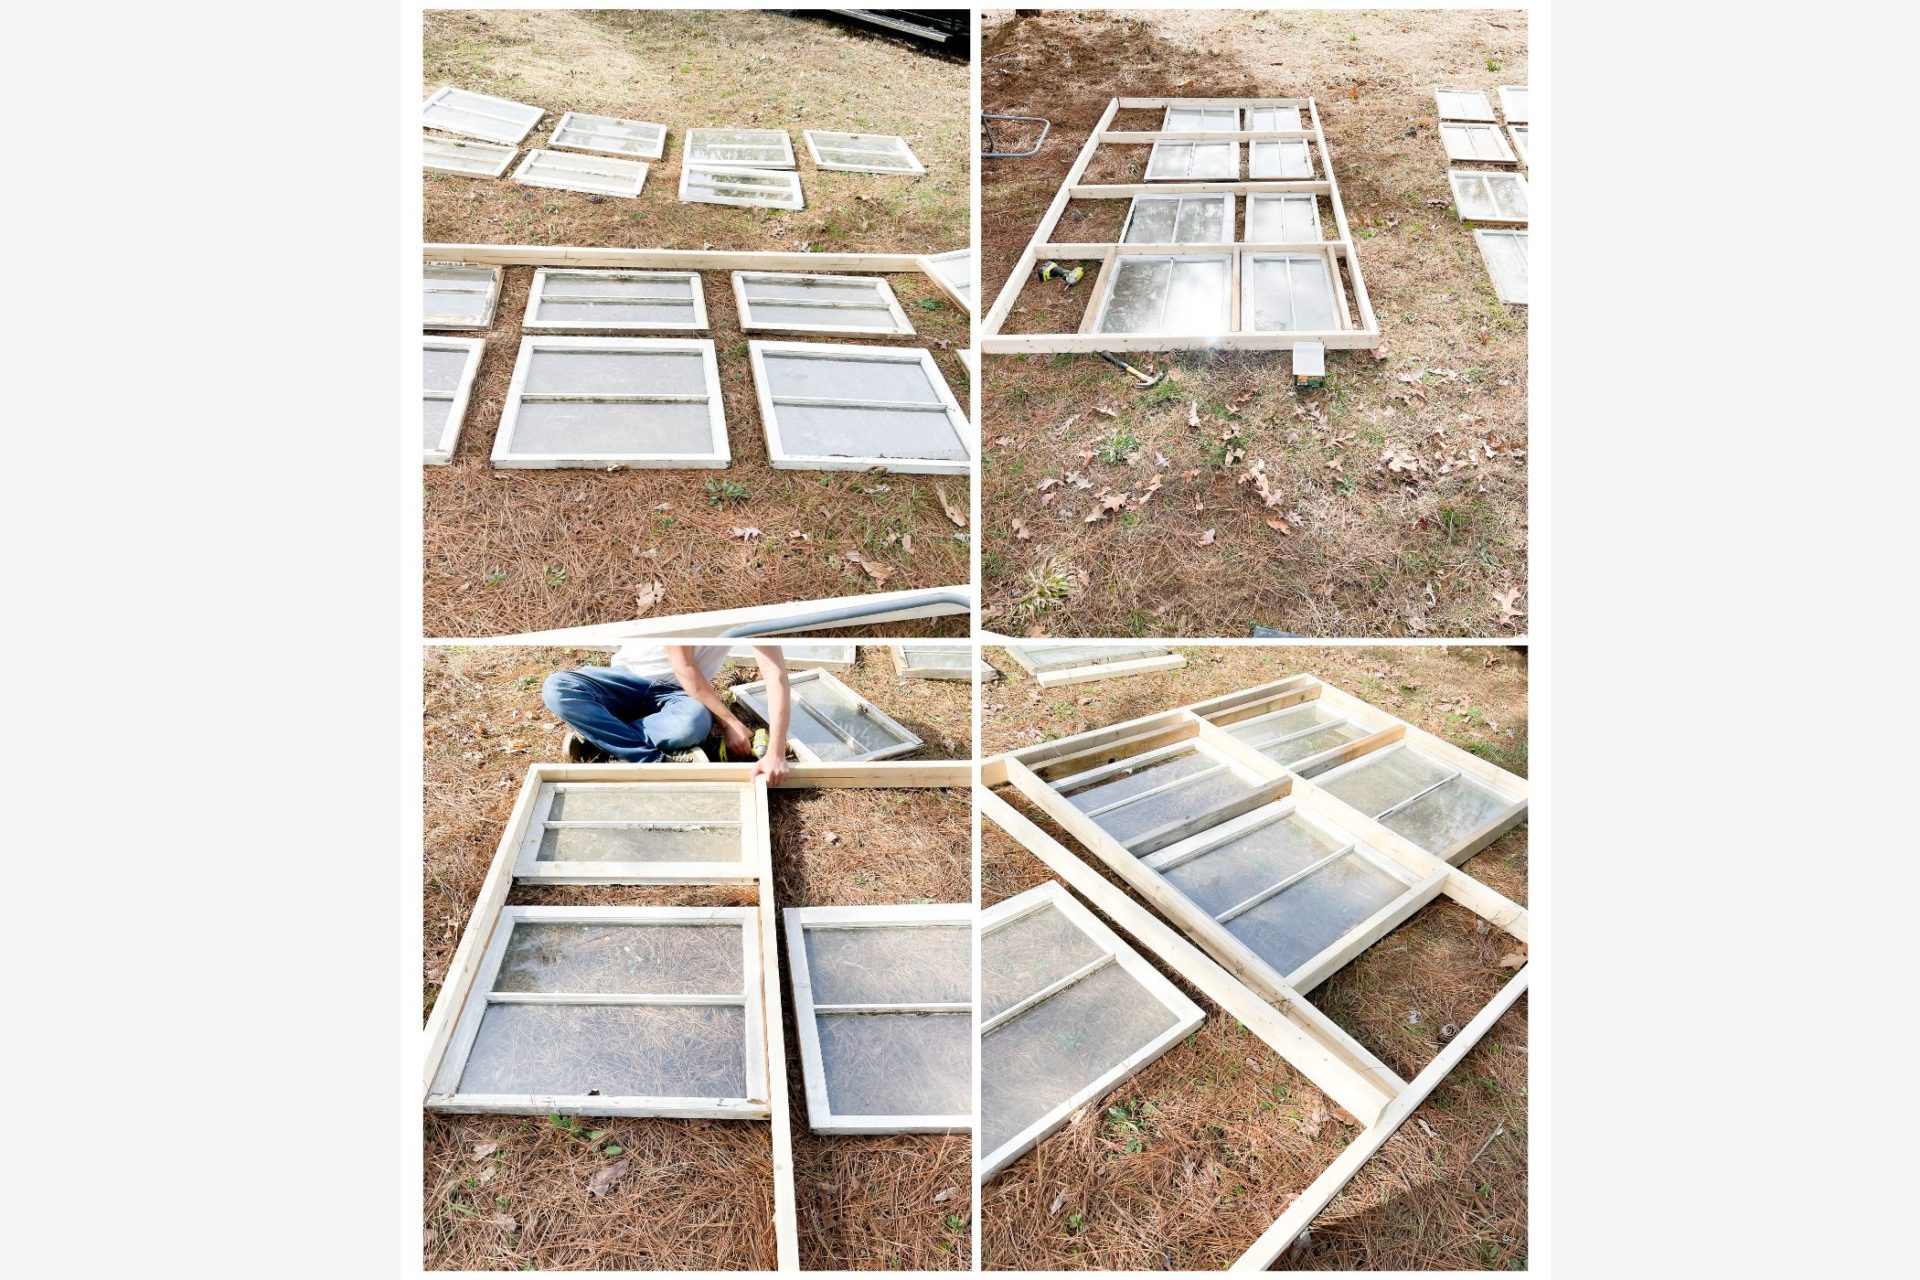
I took all the windows and laid them out on the ground the way I wanted them. I knew they were slightly different sizes and I’m very visual so this option worked best for me. Once I had them the way I wanted them we took 2 by 4’s and cut them into 6′ tall lengths for the side wall supports and 12′ tall lengths for the top and bottom. We did this for both the left and right sides as well as the back.
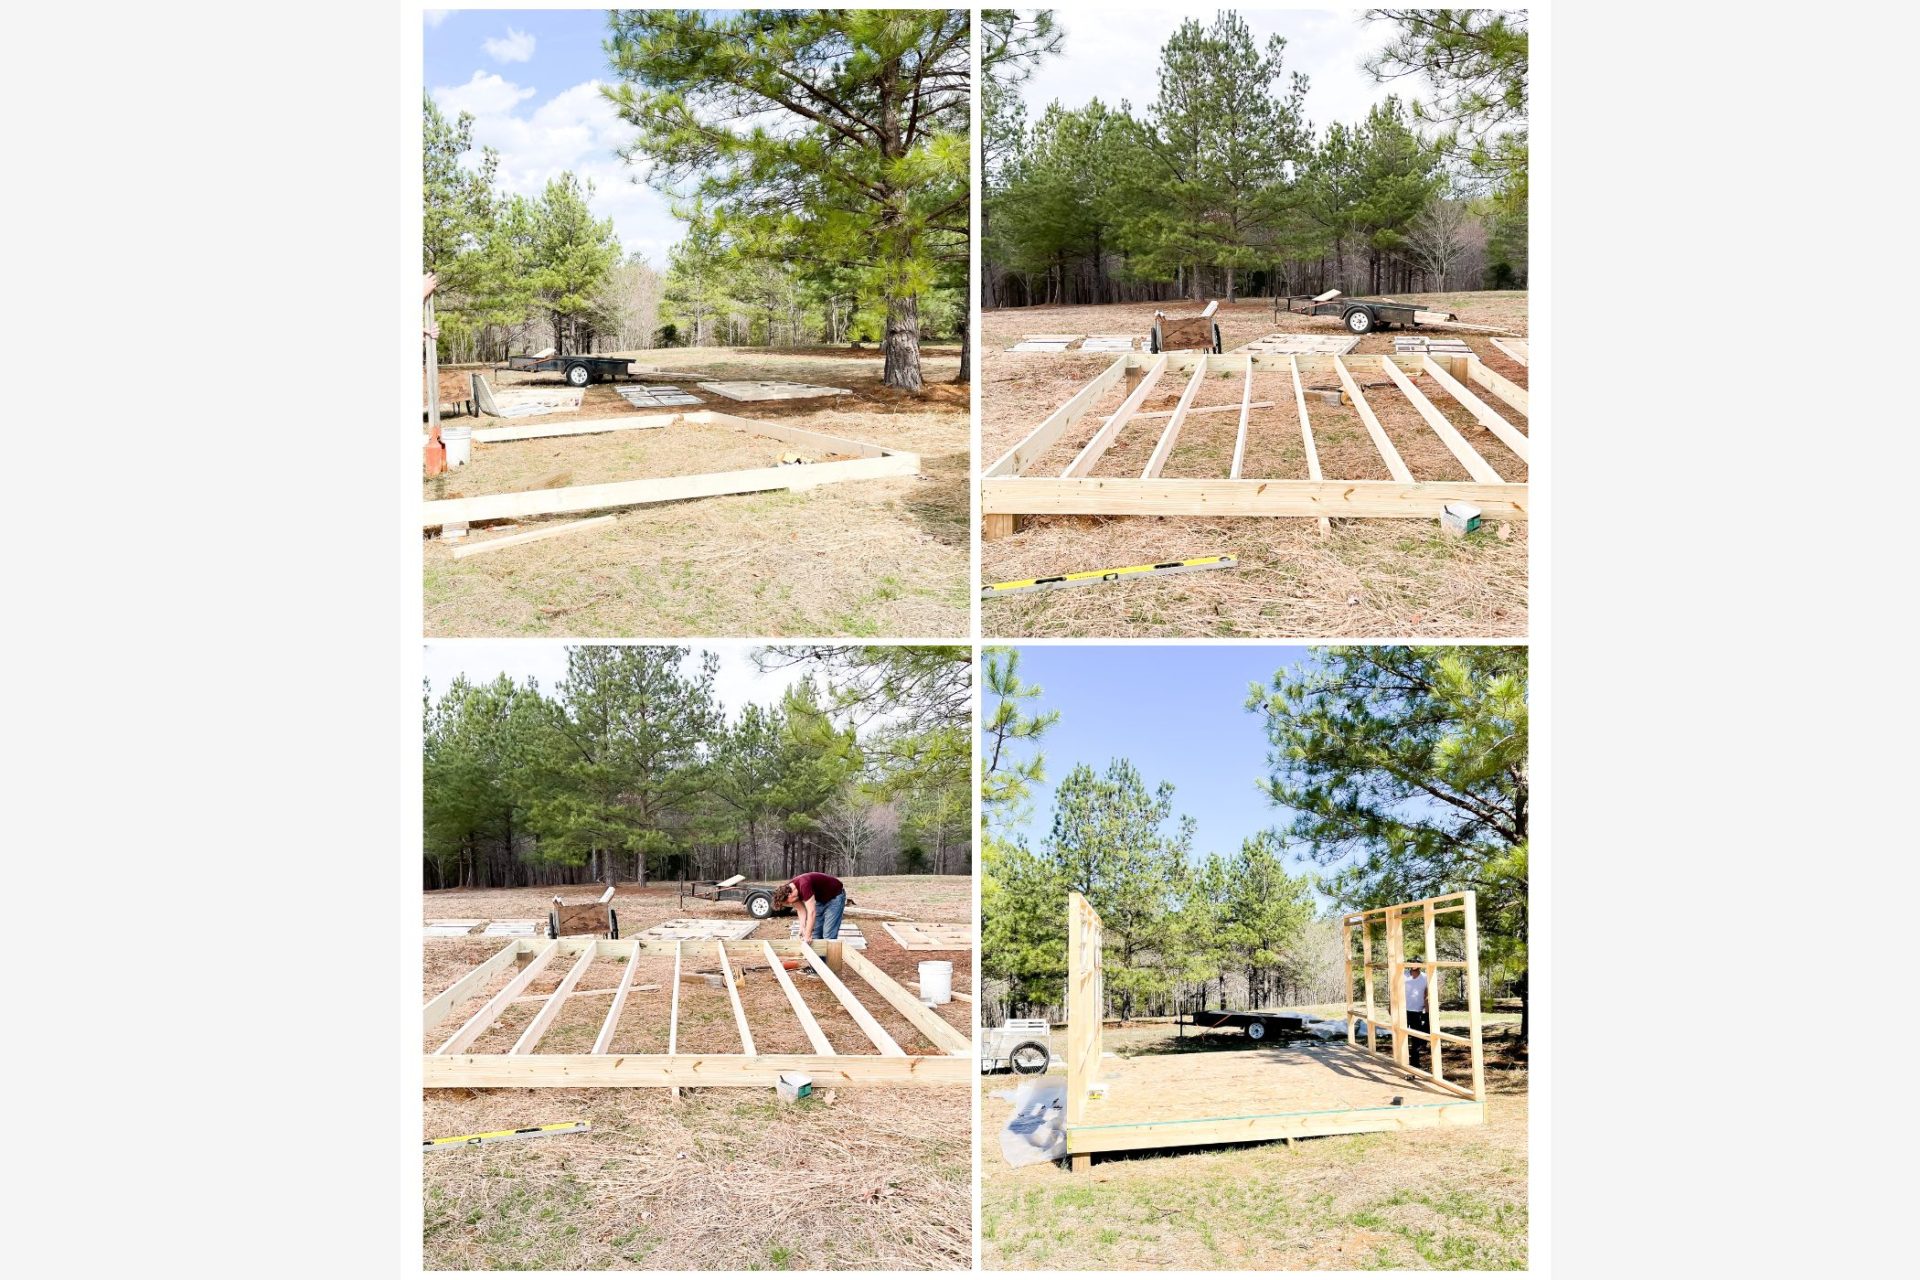
Once that was done we dug footers and put pressure treated posts in the ground, filling the holes with concrete so everything would be secure. The next day we moved onto the floor system.
For the floor we used 2 by 6 pressure treated joists and spaced them out roughly 18″. Now I know I know they should be on 16″ spacing, but it’s a greenhouse and won’t be carrying much weight. I also wanted to save as much money on lumber as I could. And let’s face it, I didn’t want to go to the store again.
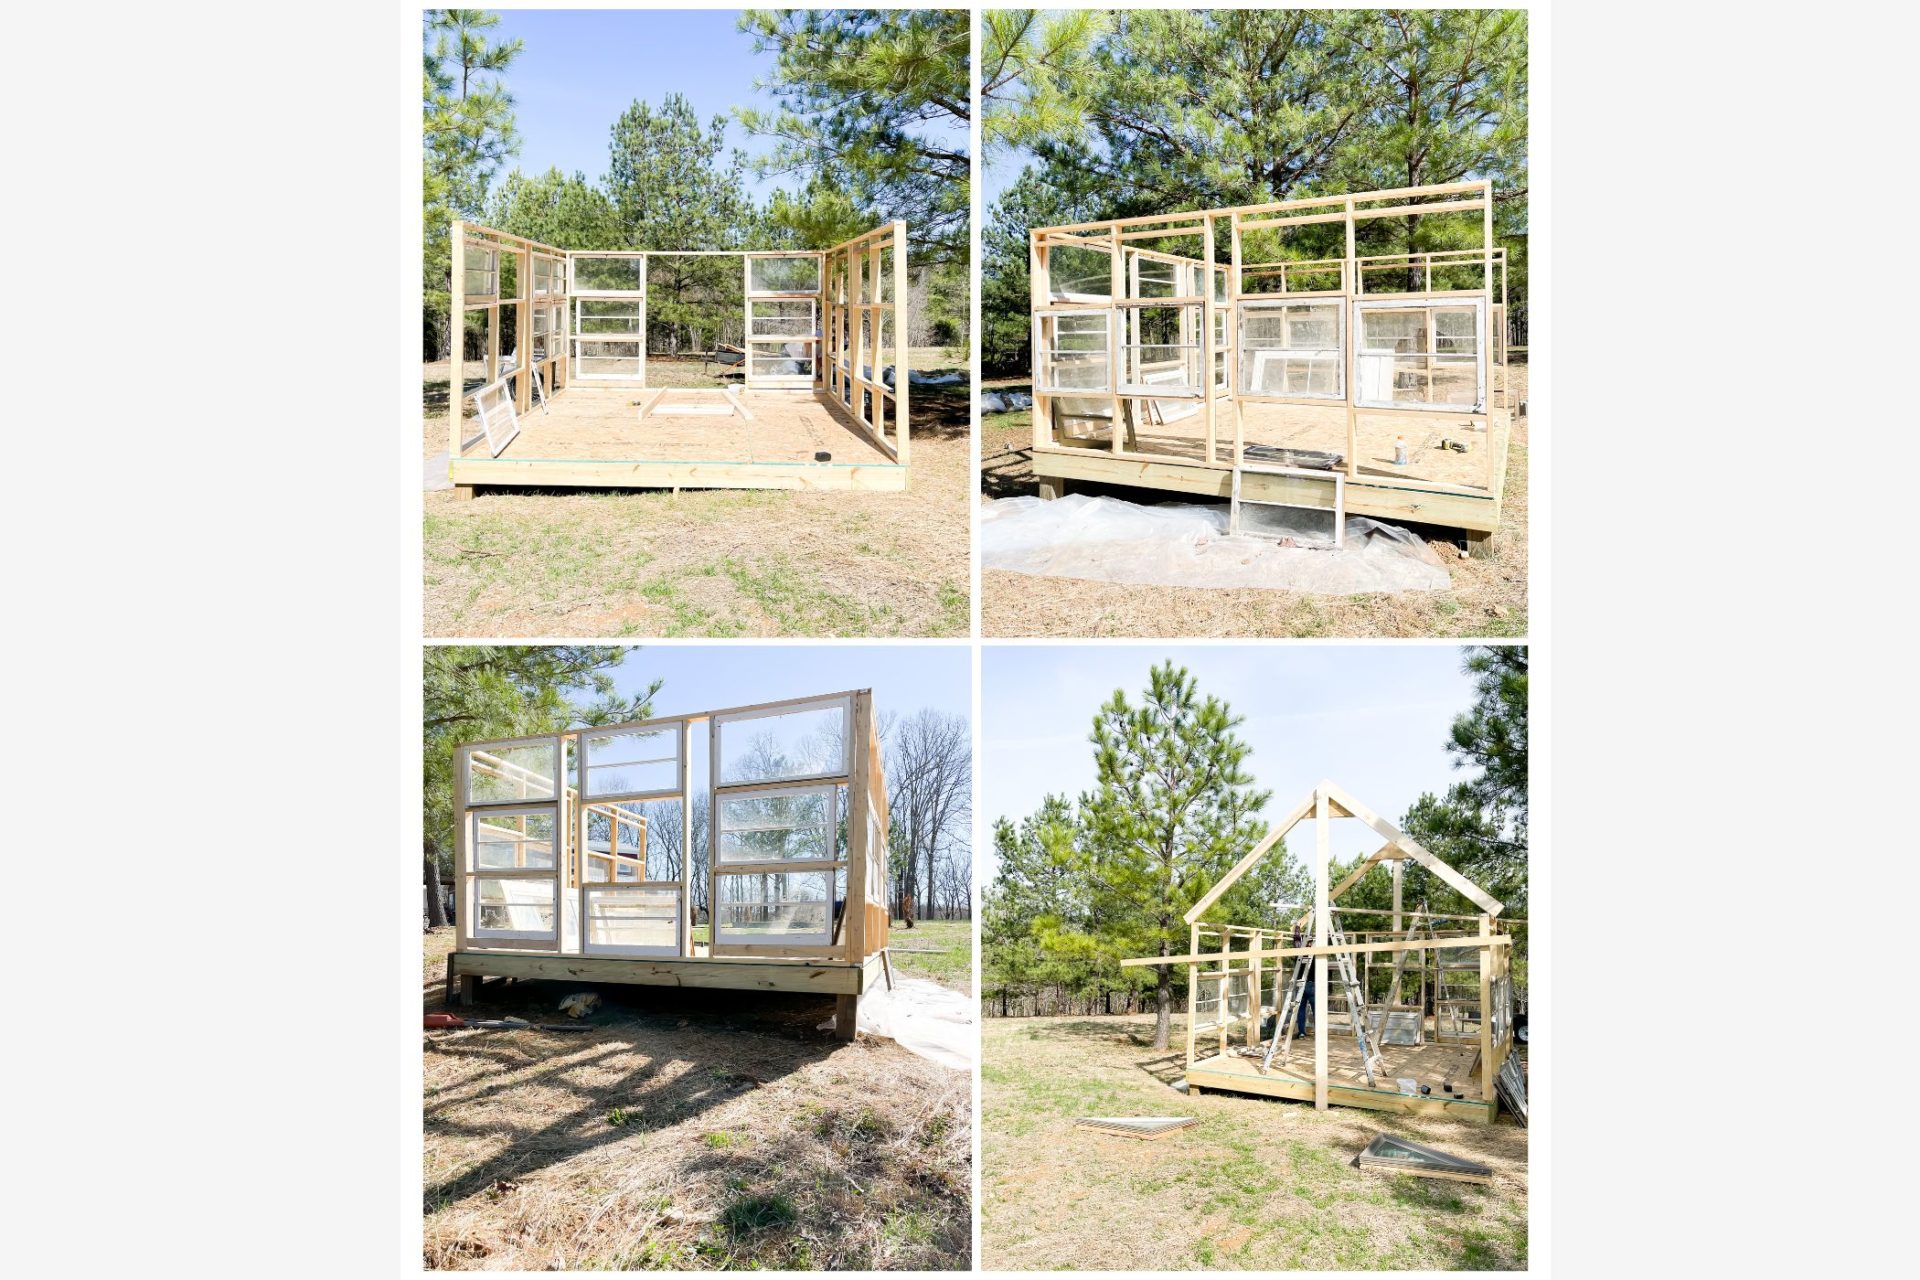
Now that we had three walls up, it was time to add the windows back in. We had only dry fit them initially and between the time we started this project and finished it, it had gotten humid and rained a few times so the windows and 2 by 4’s had done some swelling. I’m actually happy this happened. While I wanted the windows snug, I didn’t want them so tight I could open them. The swelling helped us determine that we should make a few cuts on the table saw to trim them down a bit so they fit just right and opened out easily.
Starting the roof
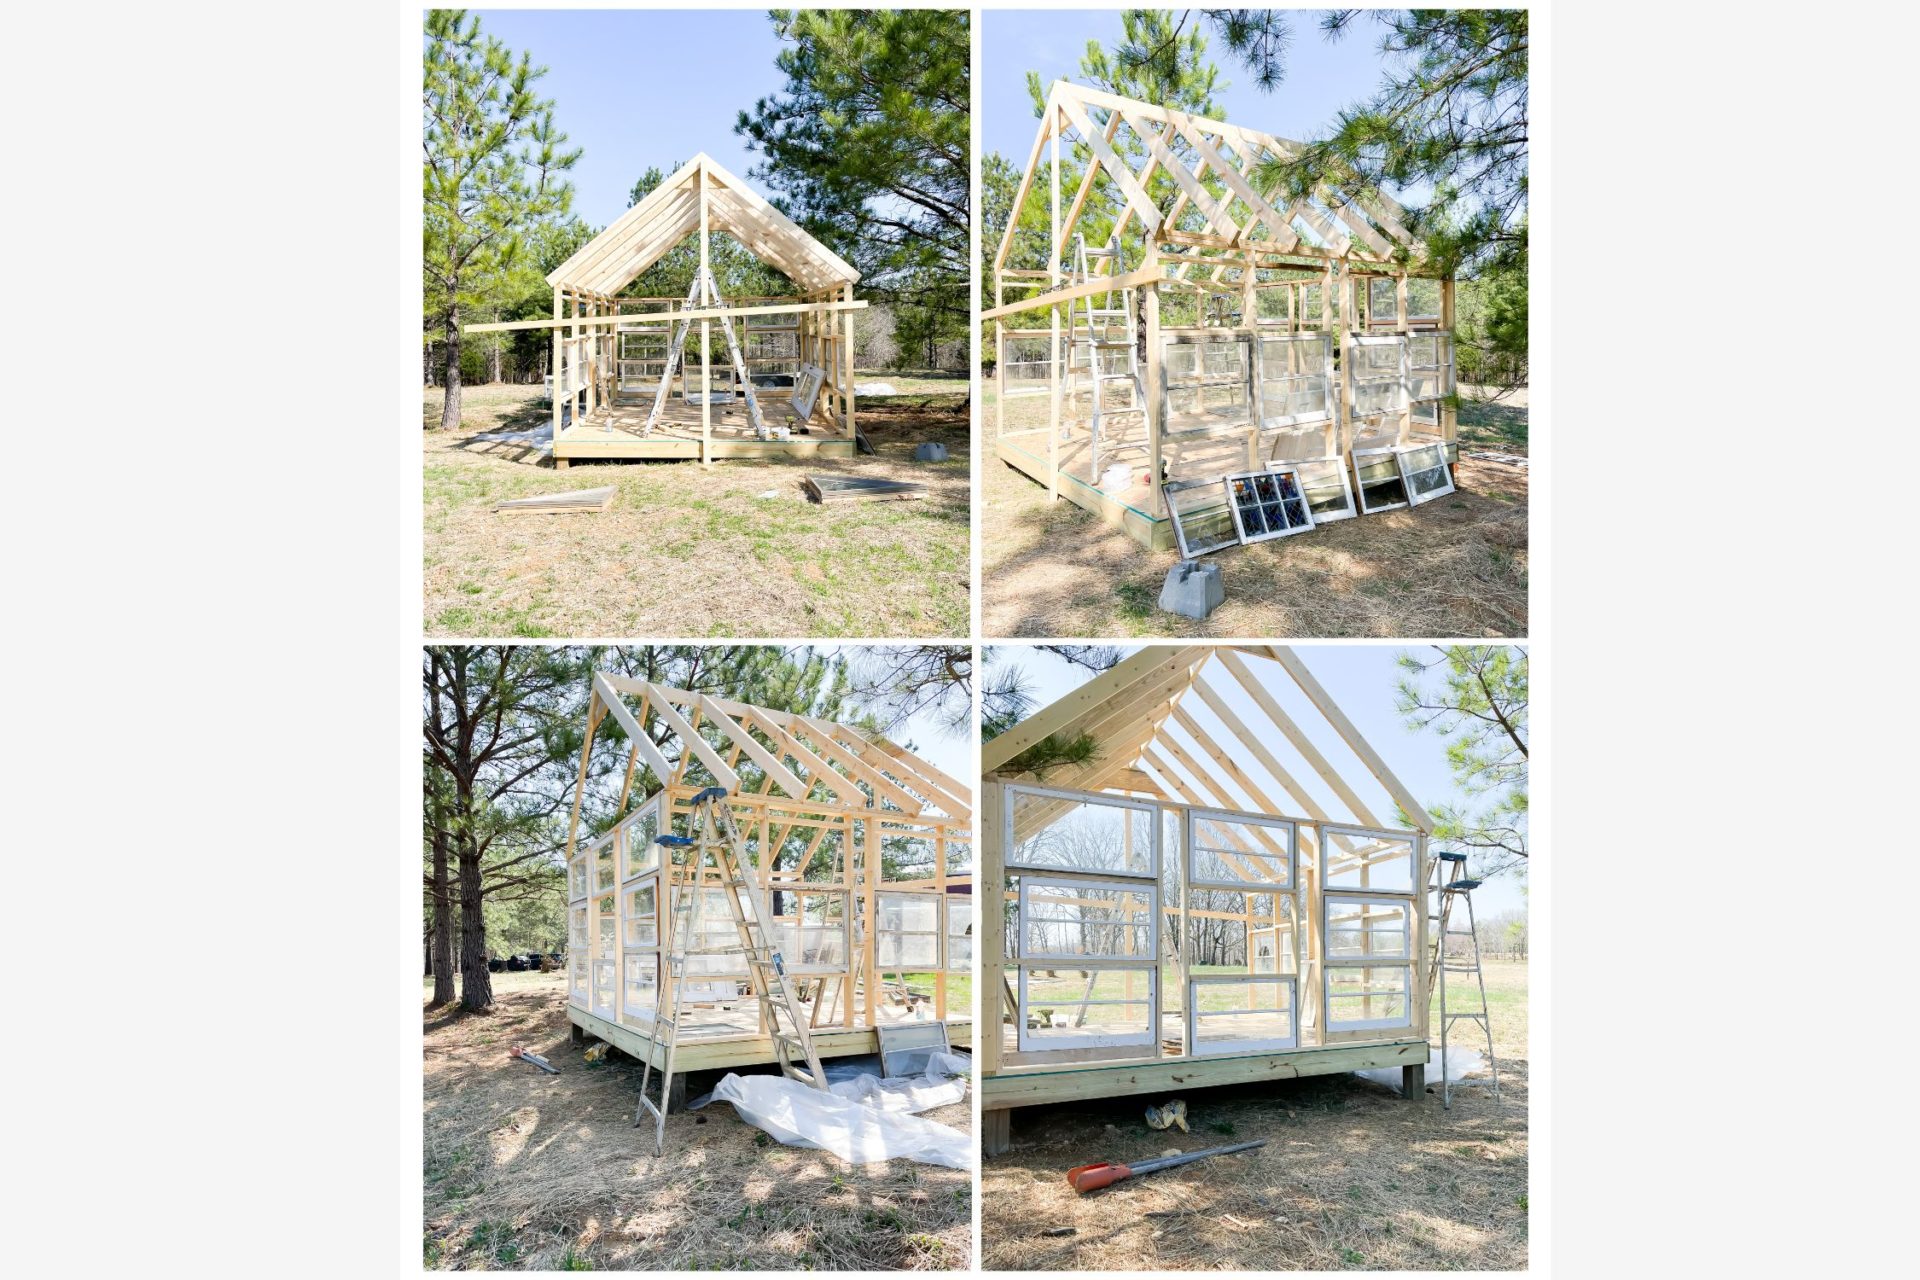
Next, it was time to start on the front and roof rafters. They went up pretty smoothly and I was super grateful my son-in-love was available to help Prince Charming. They were heavy and awkward and I’m not super crazy about holding things over my head on a ladder.
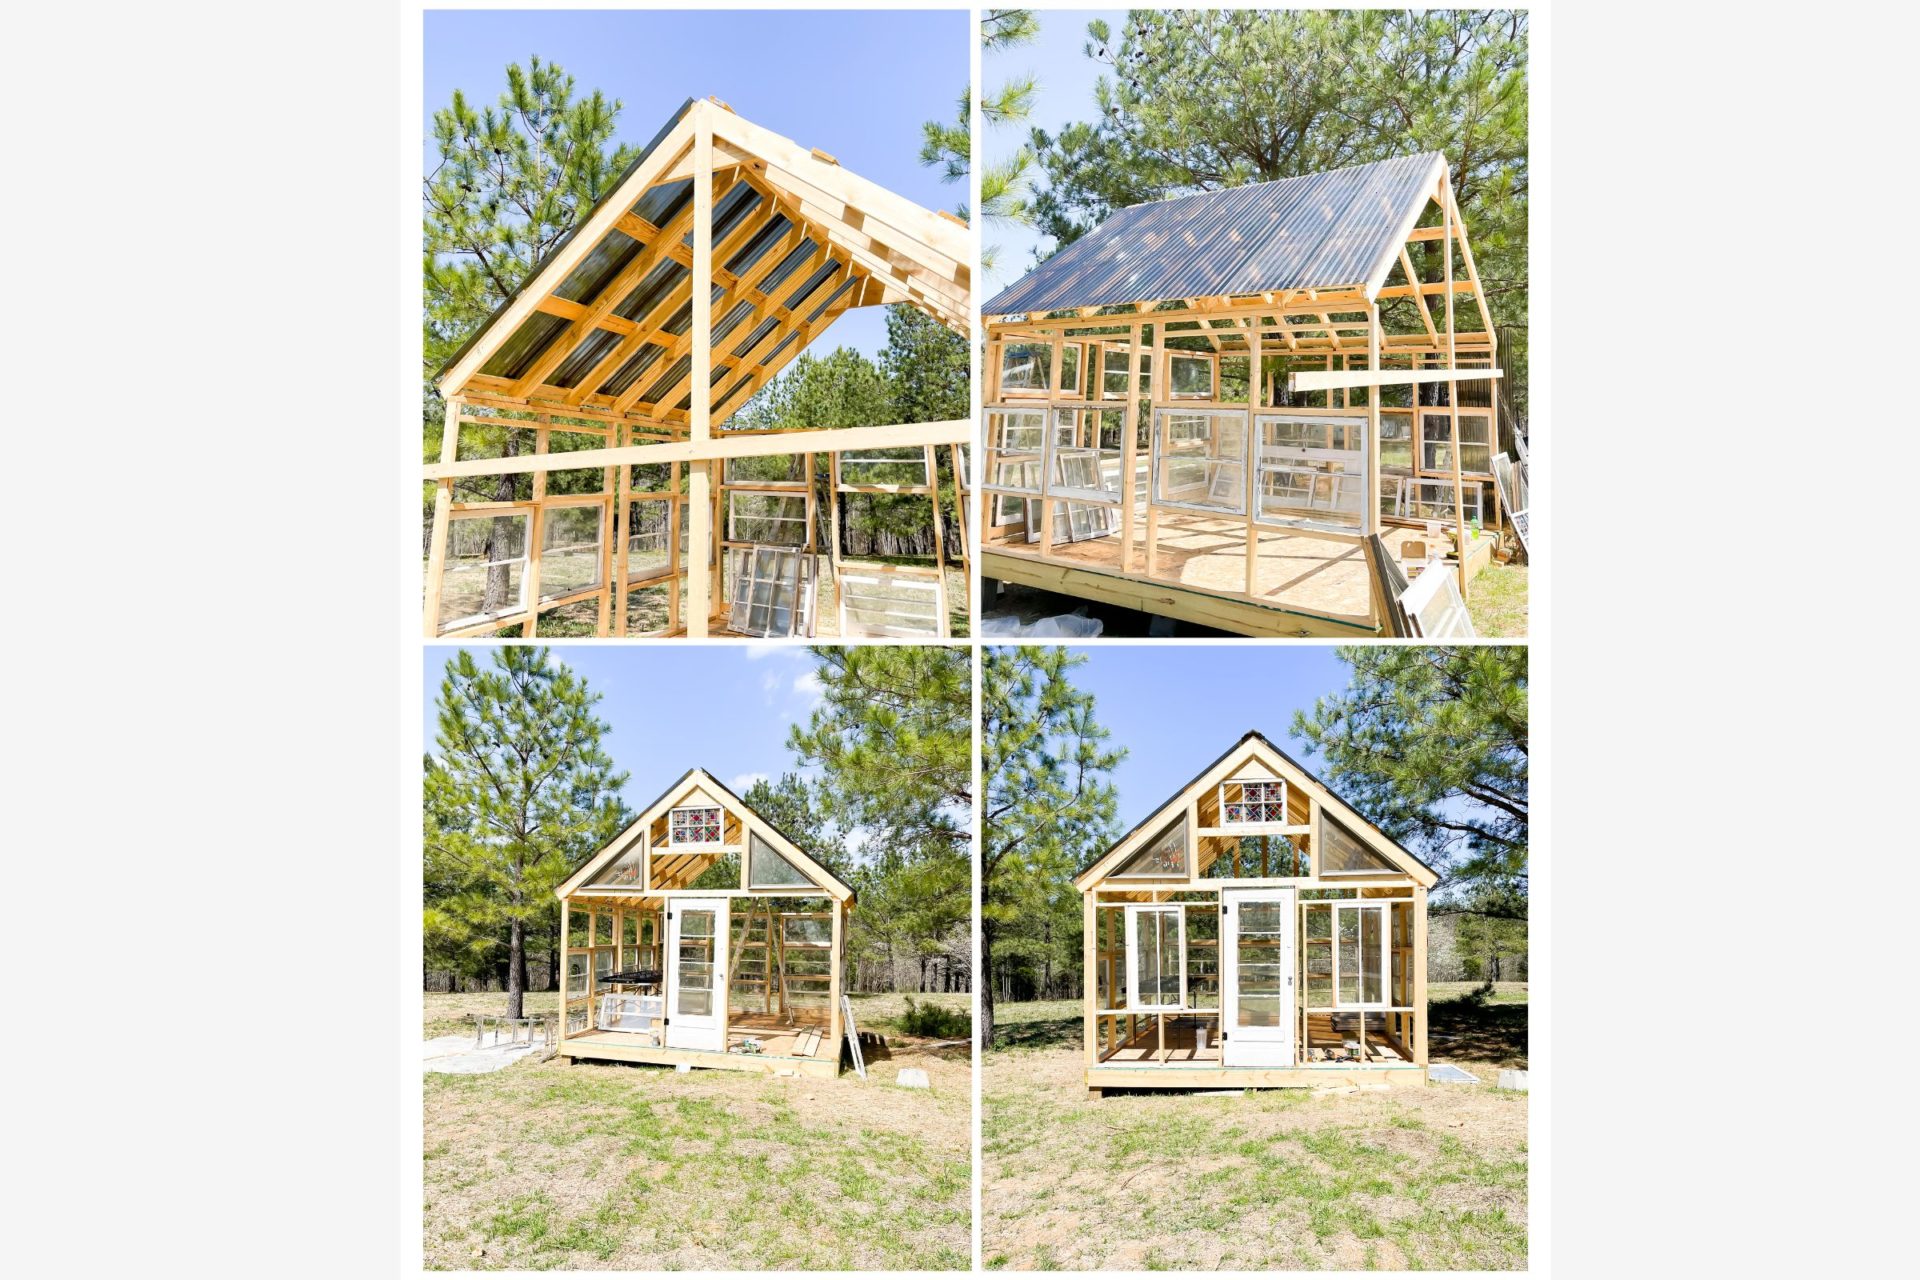
Prince Charming selected a tinted clear roof for the roofing material. I wasn’t super keen on this at first but now I’m thinking it was a really smart move. On the days that have been super sunny it hasn’t been too hot in the greenhouse and I know with summer coming a tinted roof is going to be really nice.
We decided to do our version of board and batten on the exterior. By our version I mean strips of boards spaced out so they barely cover each other. This saves on materials and we really like the look of it. If you’ve been here for a long time you might remember we did this on our barn at the farmhouse several years ago. You can see that project here.
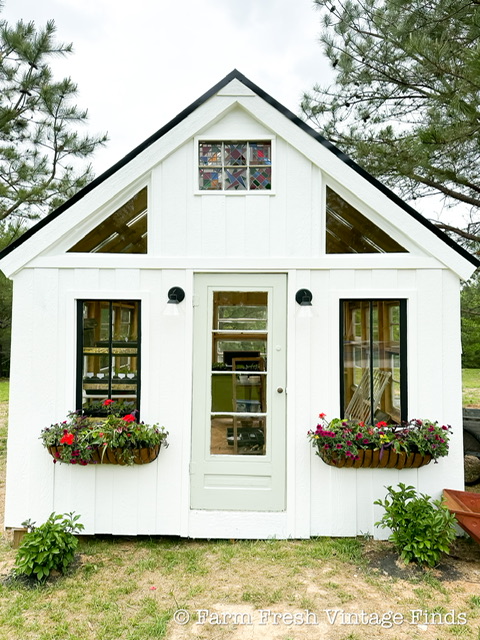
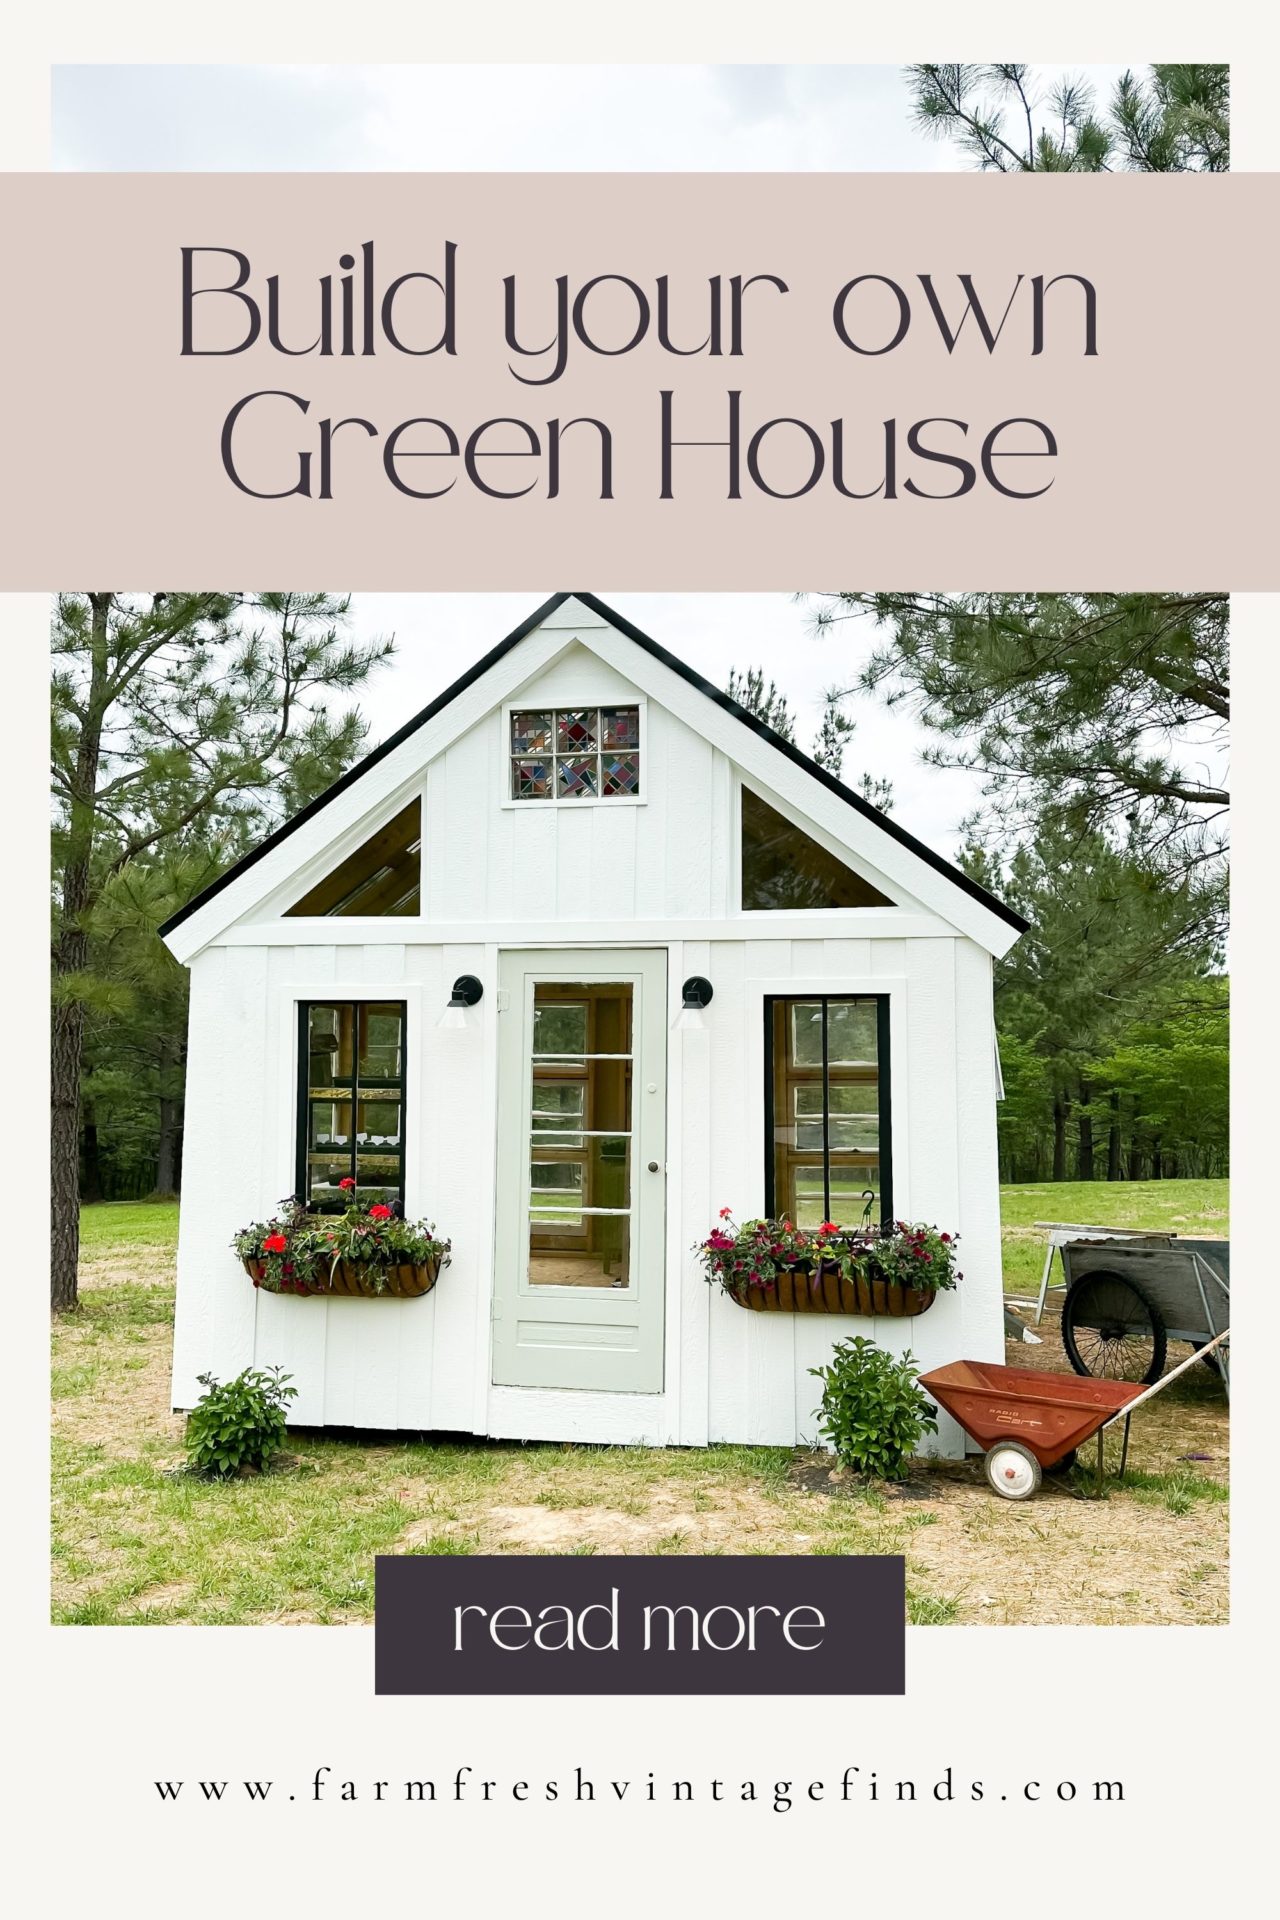
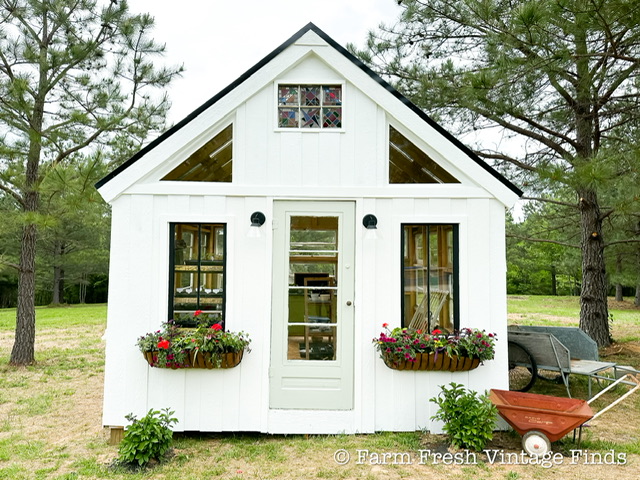
The End Result
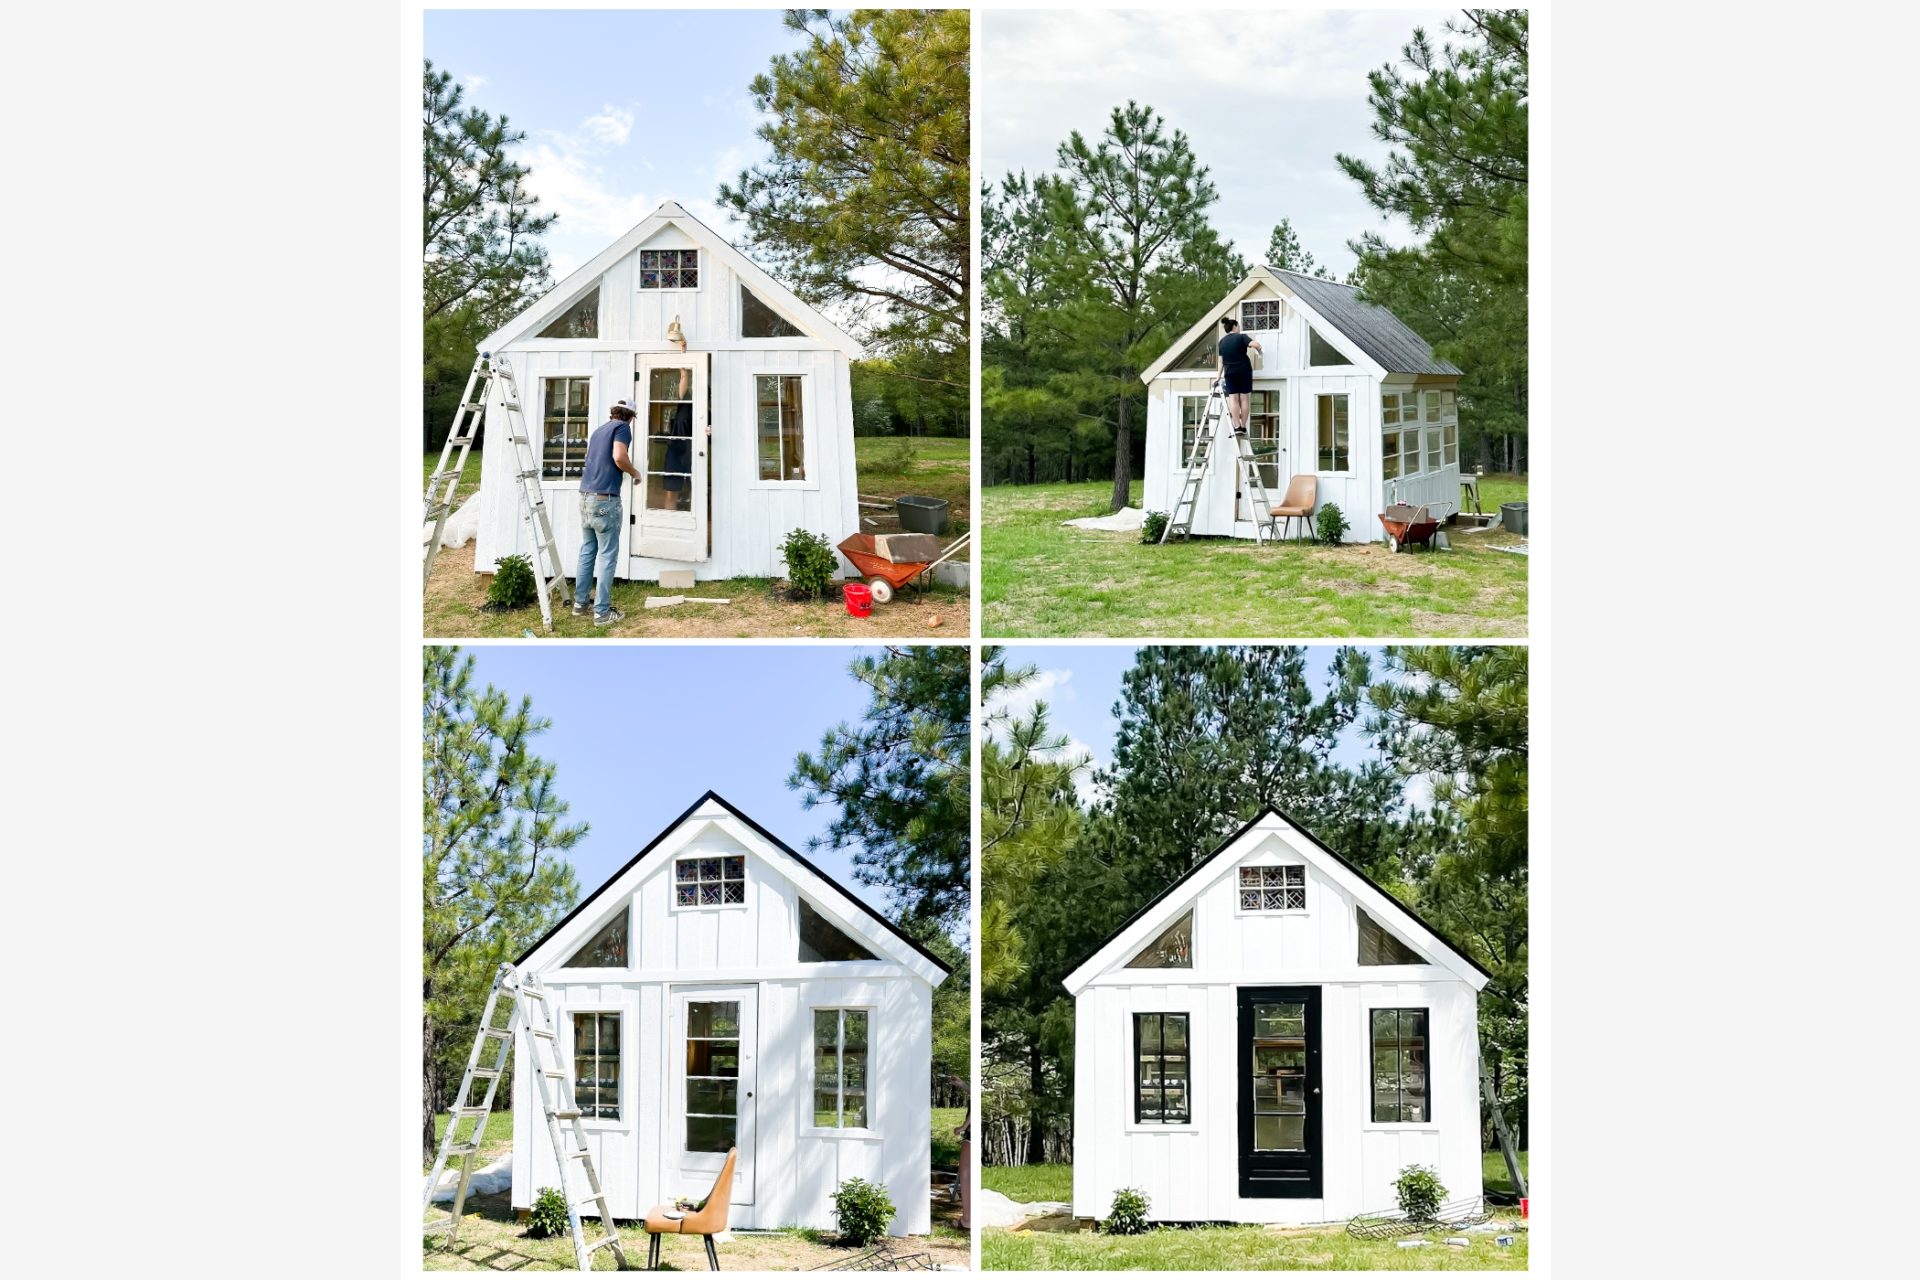
Now it was time to paint. I REALLY wanted to paint the greenhouse black. I know that might sound strange but I love black and I like being different. However I plan to paint our barndominium black someday, when I get tired of the red, so I figured I’d just do white and I think it was the right choice.
I also really struggled with the door color. Prince Charming wanted to keep it white but I though wait I’ll just paint the door black. Then I painted it and just wasn’t feeling so after painting it white, then black I finally decided on ….
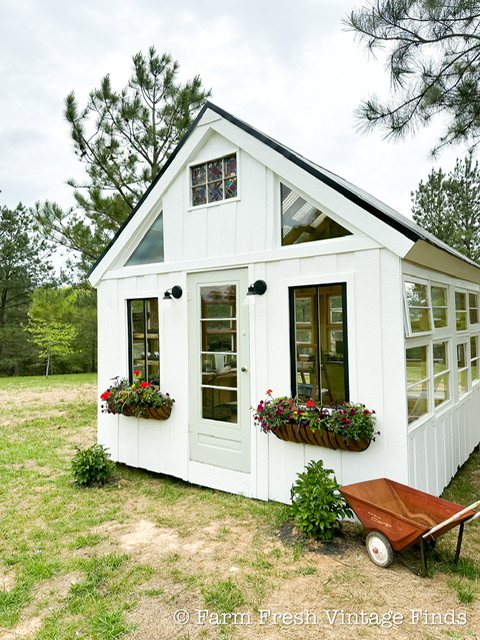
Costwold Green by Annie Sloan. It’s one of her new colors in the satin paint line and it is PERFECT! I finished it out with some planter boxes I found on Amazon. I truly couldn’t be happier with how this came out. It’s rare that I can get the image from my head to